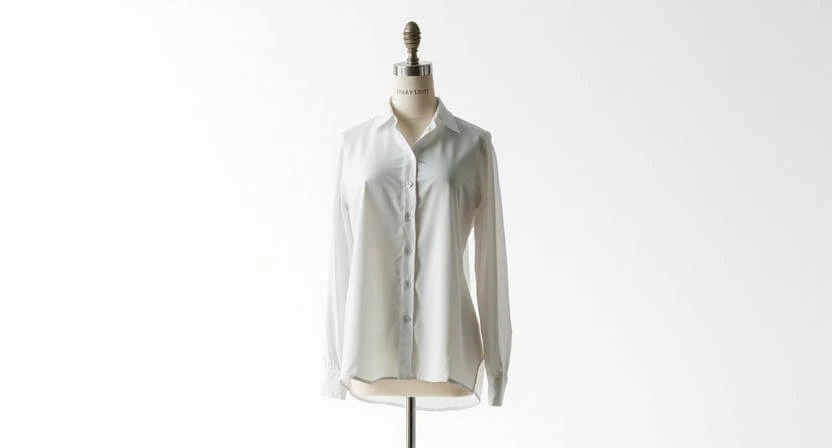
Ghost mannequin photography is a product imaging technique where a garment is photographed on a mannequin, then the mannequin is digitally removed in post-production to create a clean, hollow, three-dimensional effect. The result? Clothing appears to float in mid-air worn by an invisible figure so shoppers see shape, fit, and detail without any distraction. It is the gold standard for fashion ecommerce.
That’s the short answer. But the story behind it is richer. Let’s unpack everything: what it is, how the editing magic happens, what it costs, and why the world’s sharpest online brands swear by it.
What Is Ghost Mannequin Photography?
Ghost mannequin photography is simple in concept and surgical in execution. You dress a mannequin in your garment, shoot it from precise angles, then use photo editing software to erase every trace of the mannequin. The inside of the neck, collar, or sleeve is photographed separately and composited in. What remains is a floating garment crisp, three-dimensional, and impossibly clean.
Think of it this way. Flat lay photography is a shirt on a table. Ghost mannequin photography is that same shirt on an invisible body. The difference matters. Shape, drape, and structure survive. The mannequin does not.
Retailers love it. Amazon sellers depend on it. Shopify stores thrive on it. The technique sometimes called invisible mannequin, neck joint, or hollow man photography has become the default visual language for apparel ecommerce. And for good reason.
How Does Ghost Mannequin Editing Work?
The process splits into two distinct phases: the photography stage and the post-production stage. Both require precision. One slip in either phase, and the illusion shatters.
The Photography Stage
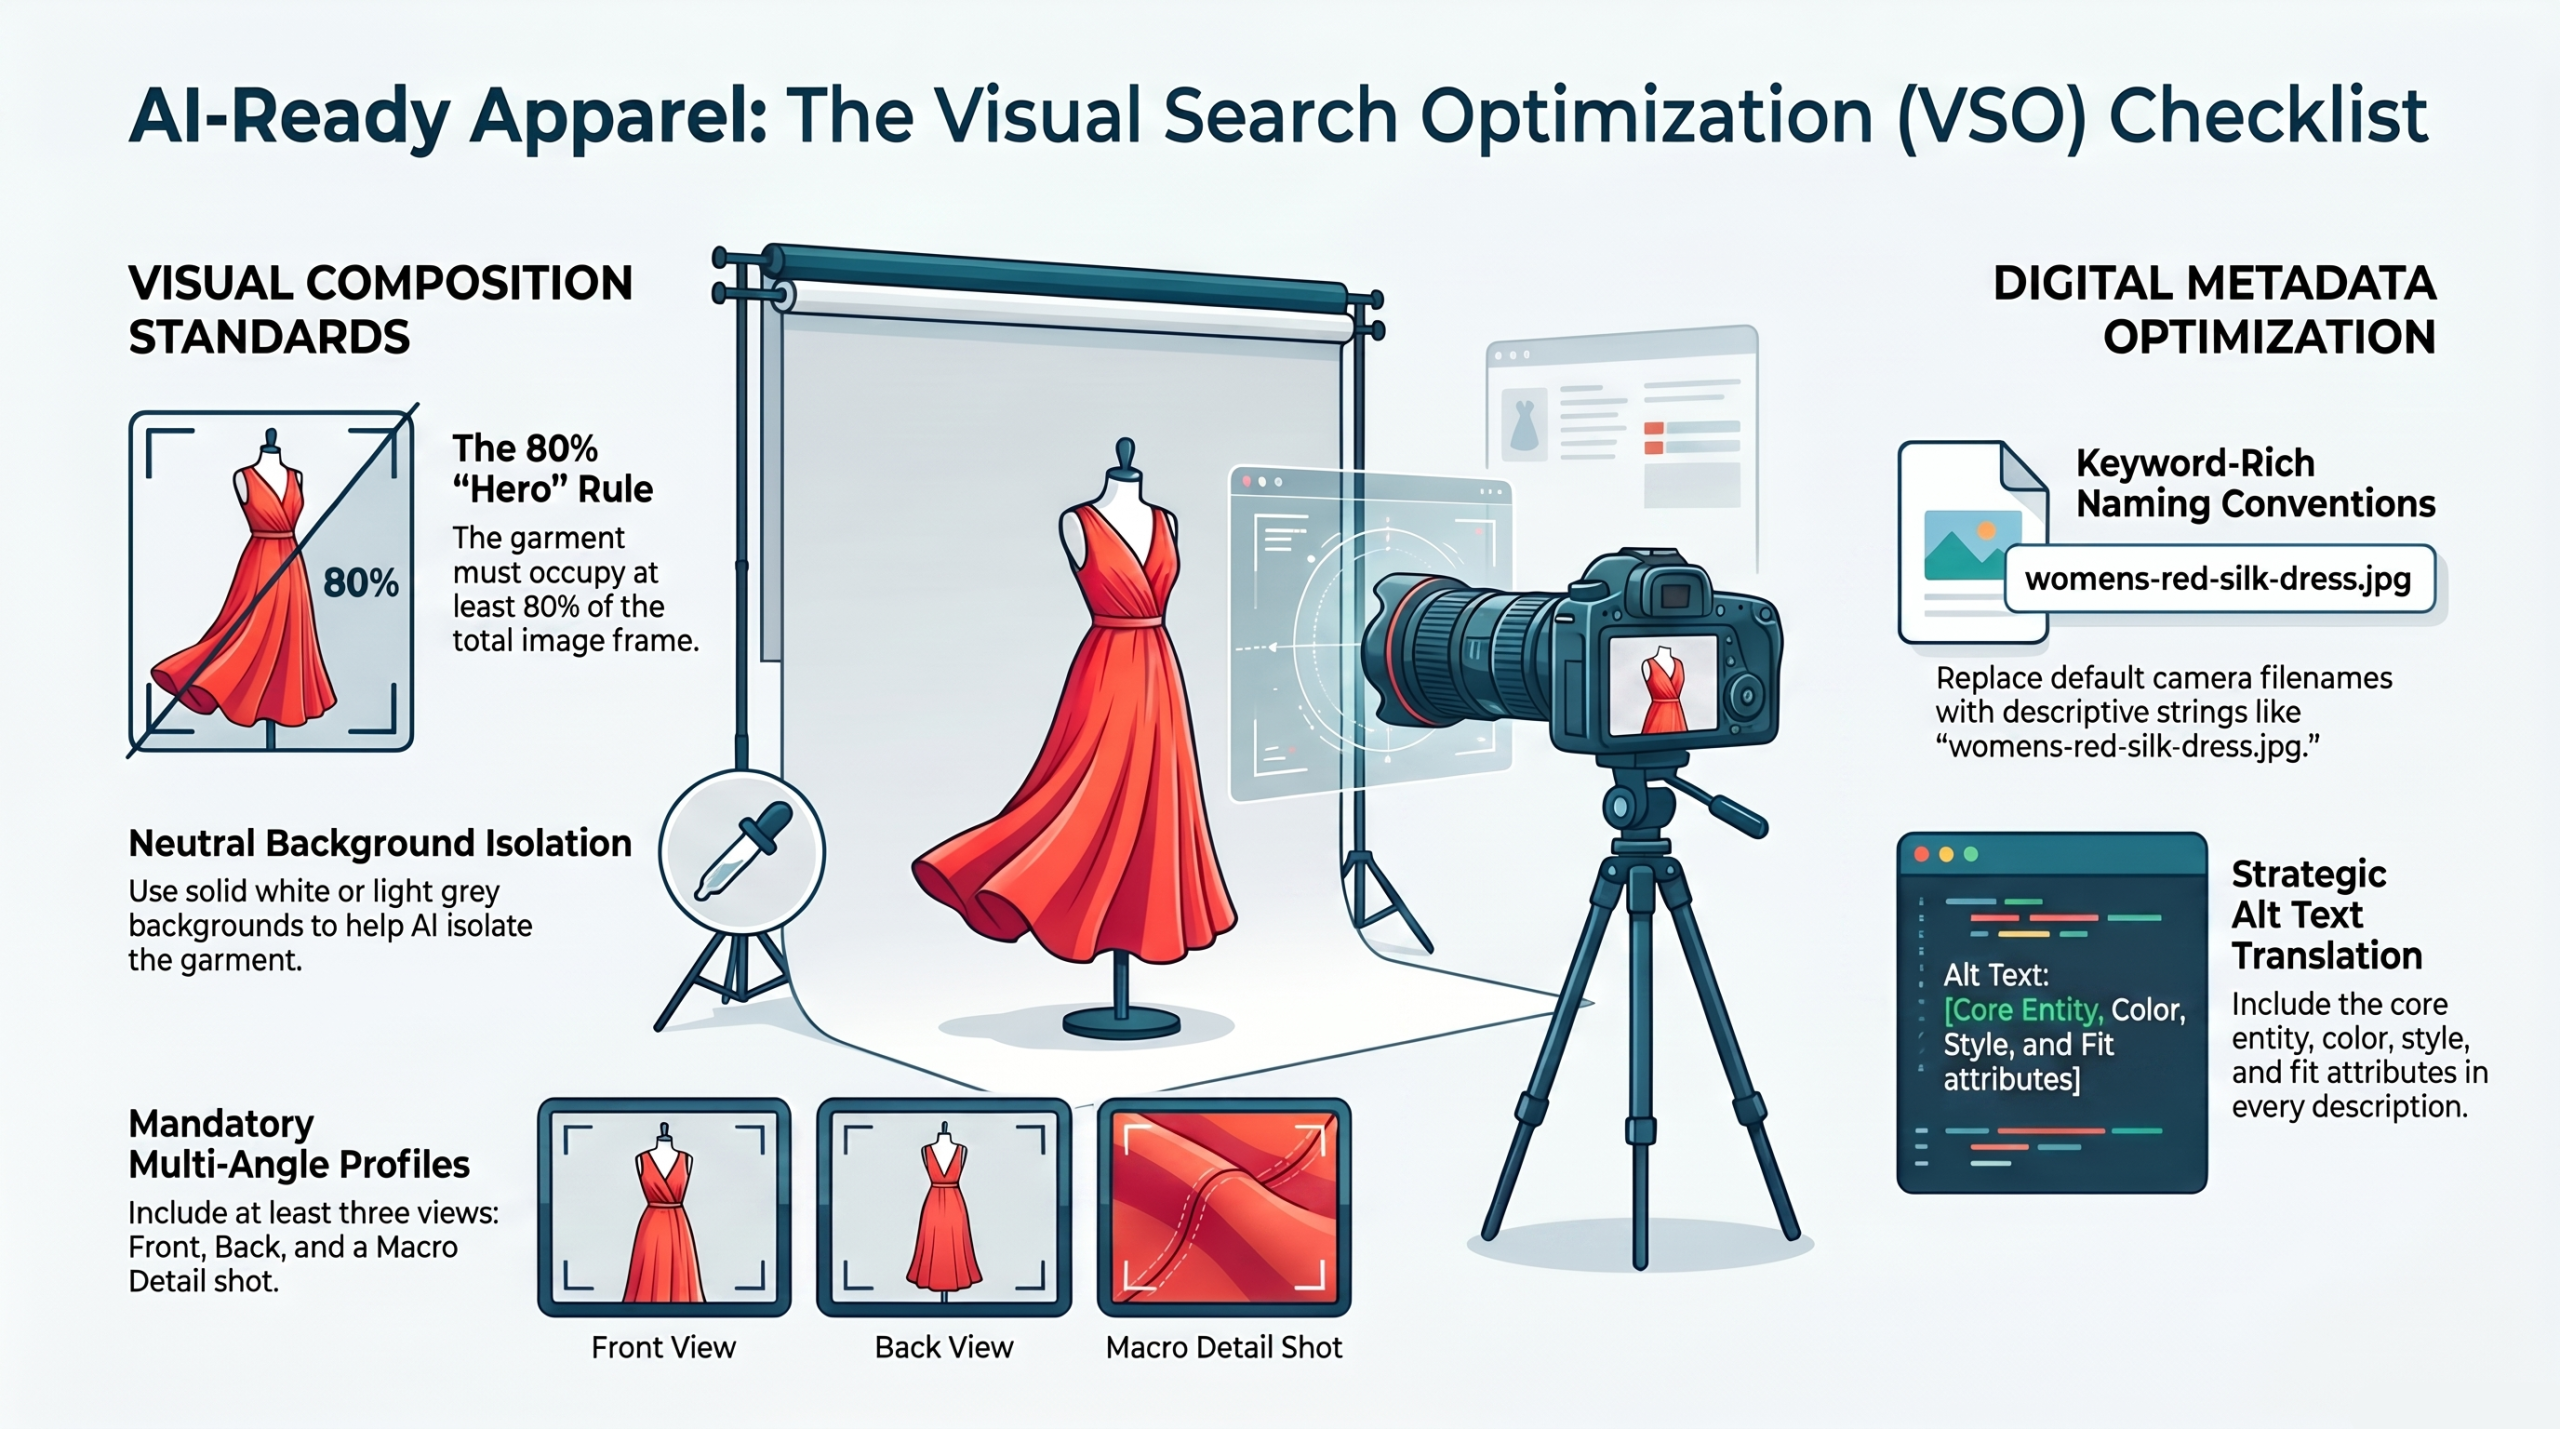
A mannequin is dressed with surgical care. Wrinkles are steamed out. Tags are removed. Pins and clips pull excess fabric tight from behind. The mannequin sits centered against a neutral background under soft, even lighting.
The photographer captures multiple shots:
- A front view showing the garment’s outer design.
- A back view for jackets, coats, or detailed rear seams.
- An interior insert shot often the neck or sleeve area photographed separately, sometimes with the garment flipped inside out.
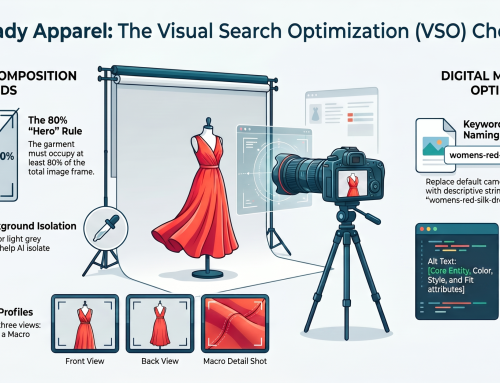
A tripod locks the camera in place. Manual exposure settings keep every frame identical. Focal length sits between 50mm and 85mm to avoid distortion. The result is a stack of perfectly aligned, clinically consistent images ready for the editing suite.
The Post-Production Magic
This is where ghost mannequin editing takes over. Adobe Photoshop is the industry standard, though GIMP and Affinity Photo also work for simpler jobs.
Editors use the Pen Tool to trace the garment edge with pixel-level precision. A layer mask hides the mannequin. The interior insert is then composited into the hollow area blended seamlessly so the neckline or armhole looks naturally empty. Shadows are preserved. Fabric texture stays intact. Color is calibrated to SRGB for web accuracy.
When done right, the final image feels honest. Clean. Almost tactile. The shopper sees exactly what they’ll receive no models, no props, no guesswork.
Ghost Mannequin Photography vs. Other Methods
Not every apparel shot is created equal. Here is how the main techniques compare.
| Factor | Ghost Mannequin | Flat Lay | On-Model |
| Visual depth | 3D, body-like | 2D, top-down | 3D, human |
| Fit visibility | Strong | Limited | Strong |
| Speed | Moderate | Fast | Slow |
| Cost per image | Medium | Lower | High |
| Distraction level | None | Low | Moderate |
| Best use | Product pages, catalogs | Social media, bundles | Lookbooks, brand campaigns |
Ghost mannequin photography occupies a strategic middle ground. It delivers the three dimensional realism of a model shot without the cost, logistics, or visual distraction. Flat lay is faster and cheaper but cannot communicate fit. Models bring emotion and lifestyle context but can overpower the product itself.
For product detail pages especially on Amazon and Shopify ghost mannequin consistently outperforms alternatives. One study found clean ghost mannequin images can lift conversion rates by up to 21% and reduce fashion returns by up to 15%.
Why Ecommerce Brands Choose Ghost Mannequin Photography
The benefits are not subtle. They hit the bottom line directly.
- Higher conversions. Shoppers see exactly how a garment fits and drapes. Confidence climbs. Hesitation drops.
- Fewer returns. When the product matches the image, fewer customers send it back. Narvar reports that 42% of apparel returns happen because “it didn’t look like the photo.” Ghost mannequin closes that gap.
- Cost savings. No models. No stylists. No reshoots. One mannequin serves every SKU. Brands routinely save 60–70% on photography costs.
- Catalog consistency. Uniform lighting, angles, and backgrounds make an entire product line look cohesive and premium.
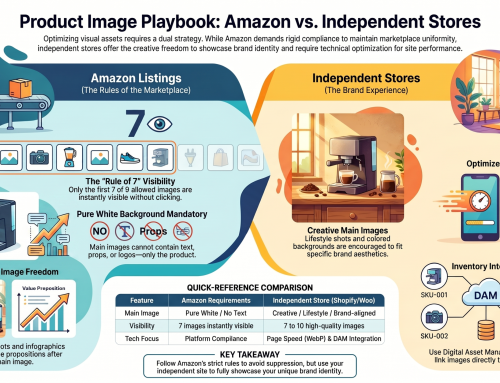
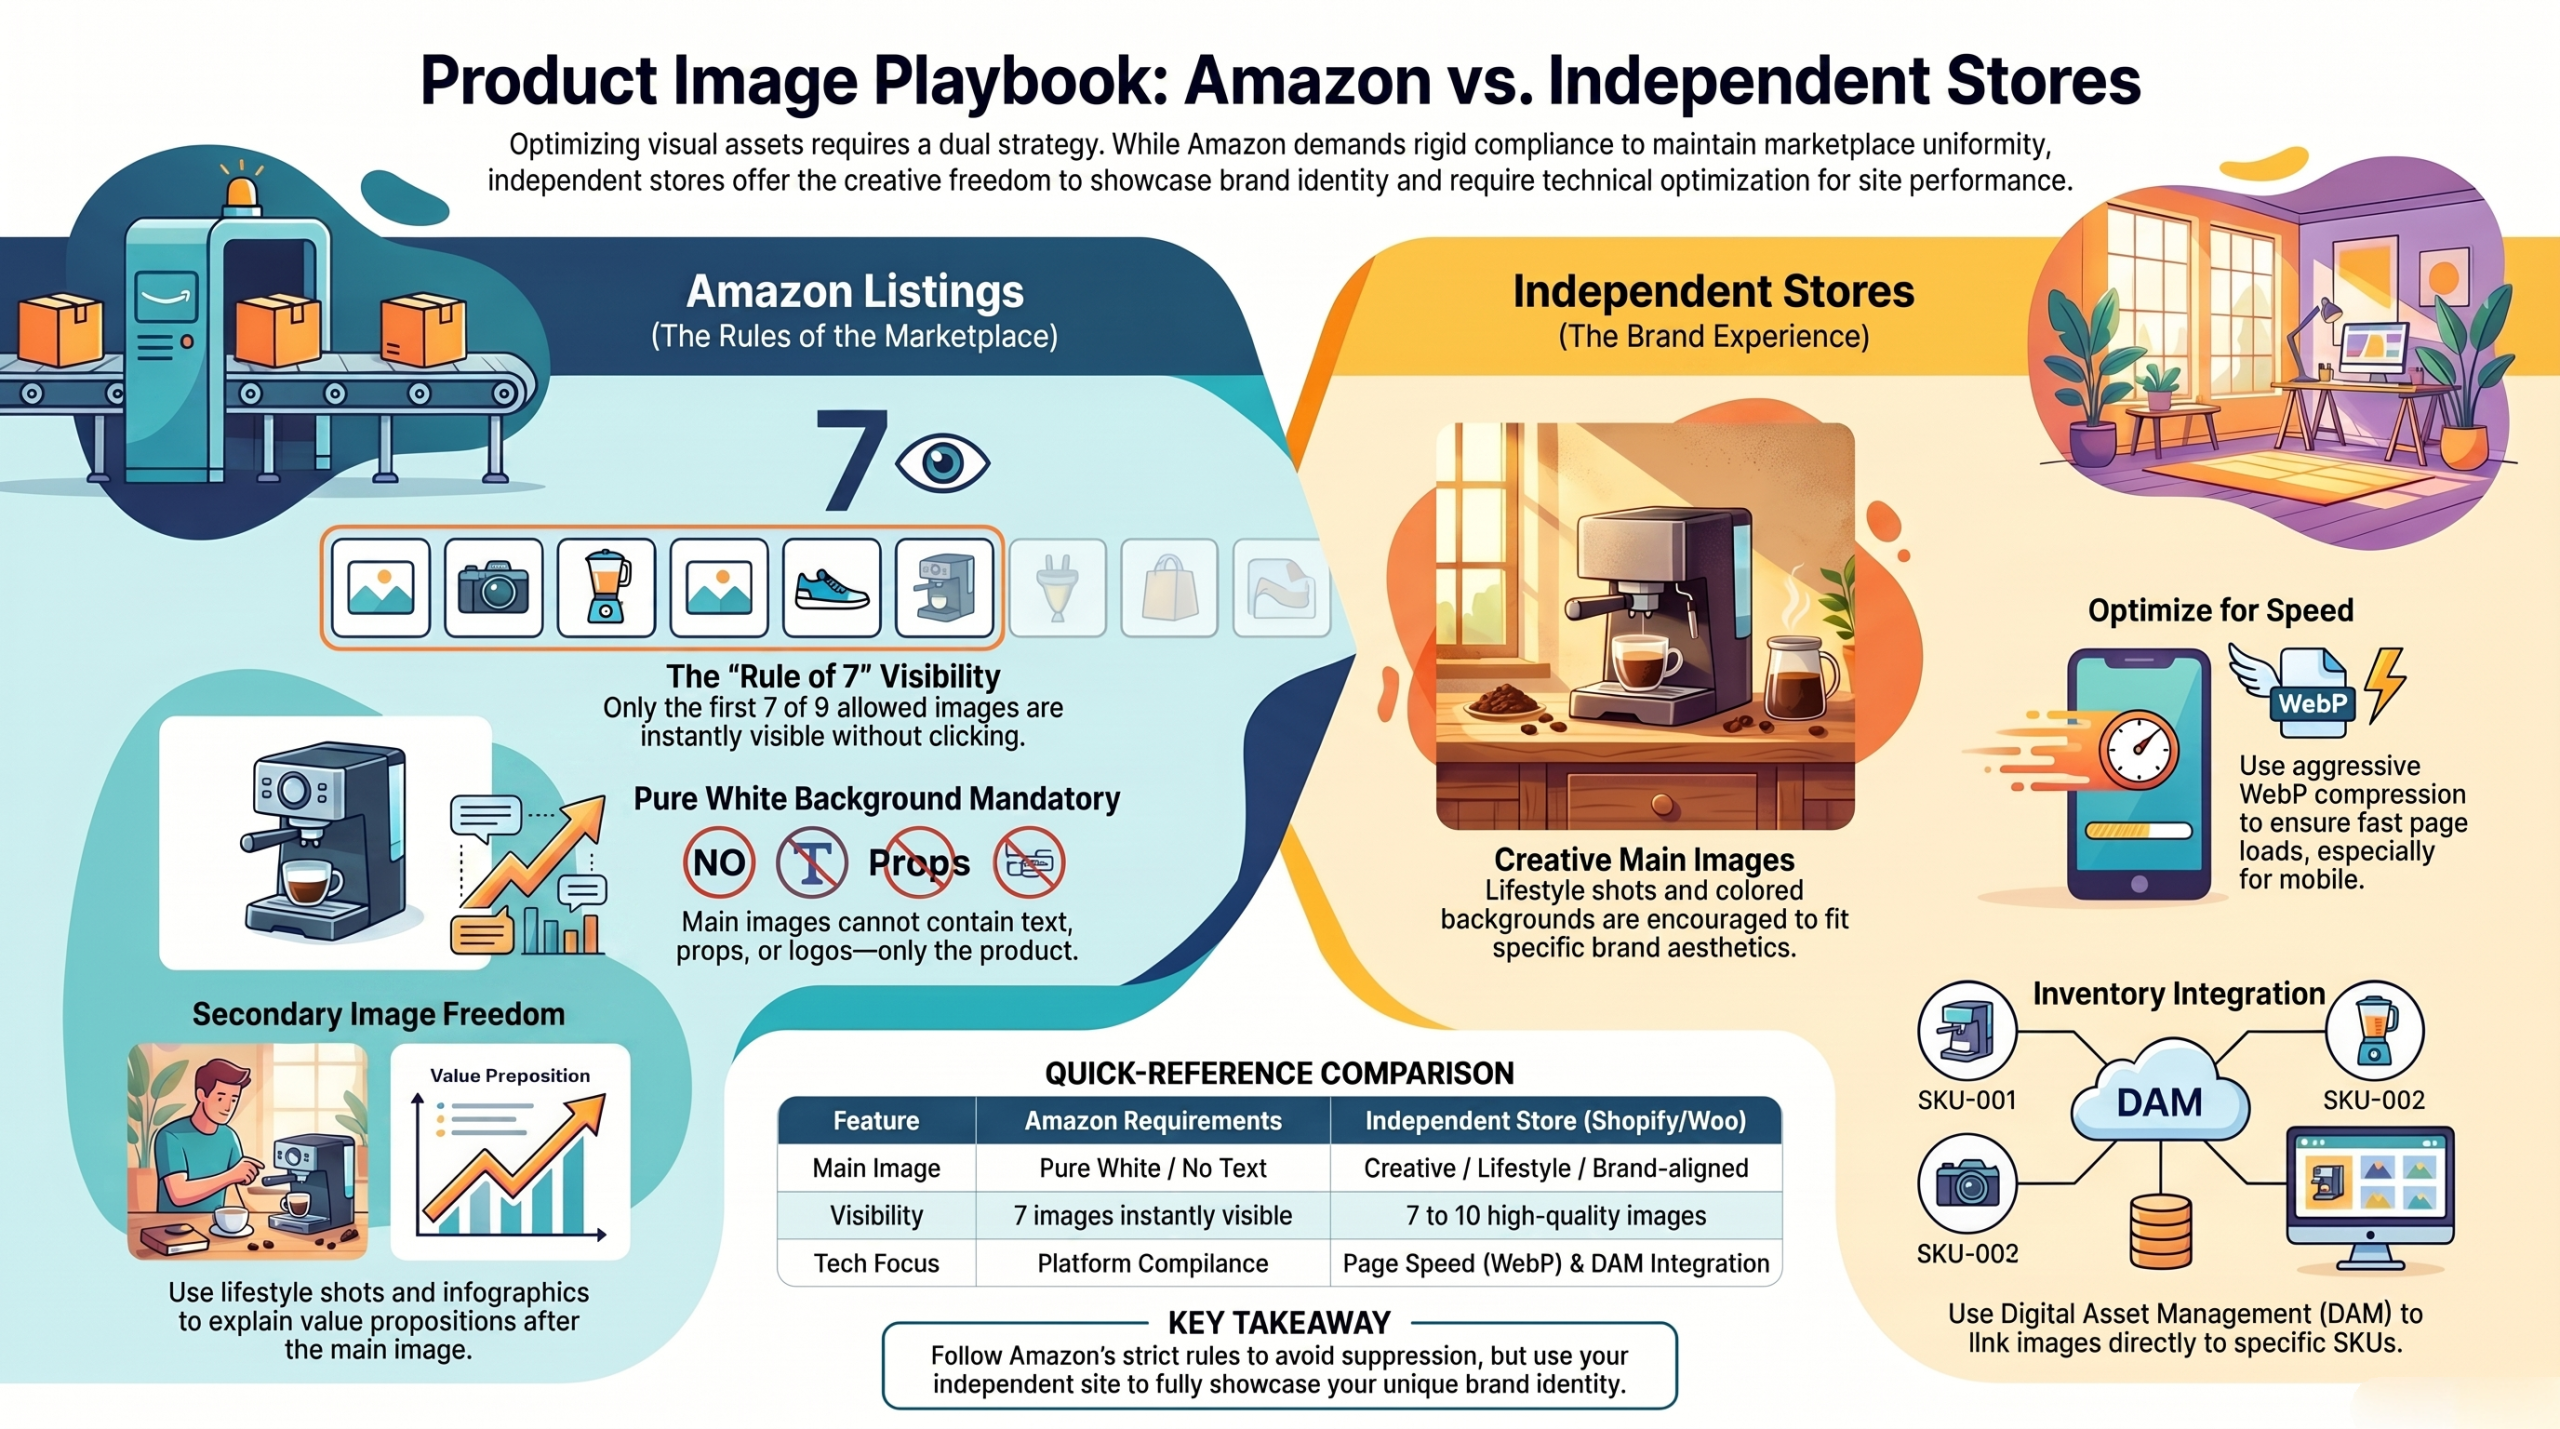
- Platform compliance. Amazon demands pure white backgrounds and zero distracting elements in main images. Ghost mannequin delivers exactly that.
It’s a quiet engine of trust. And in ecommerce, trust translates directly into revenue.
What Does Ghost Mannequin Photography Cost?
Pricing varies wildly by region, volume, and complexity. Here is a snapshot of the current market.
| Service Type | Price Range (Per Image) |
| Full-service studio shoot (US/UK) | 60– 60–120 |
| Mid-tier studio packages | 25– 25–55 |
| Editing-only (outsourced) | 0.50– 0.50–4.00 |
| Bulk overseas editing | 0.40– 0.40–2.00 |
A full-service studio handles everything: steaming, styling, photography, and editing. You pay more but receive ready-to-upload assets. Editing-only services require you to shoot the images yourself, then send them out for post-production. This can cut costs dramatically especially for brands managing hundreds of SKUs.
The key is matching your budget to your volume. If you need three hero images for a flagship product, invest in a studio. If you need 500 SKUs edited by Tuesday, bulk editing services are your answer.
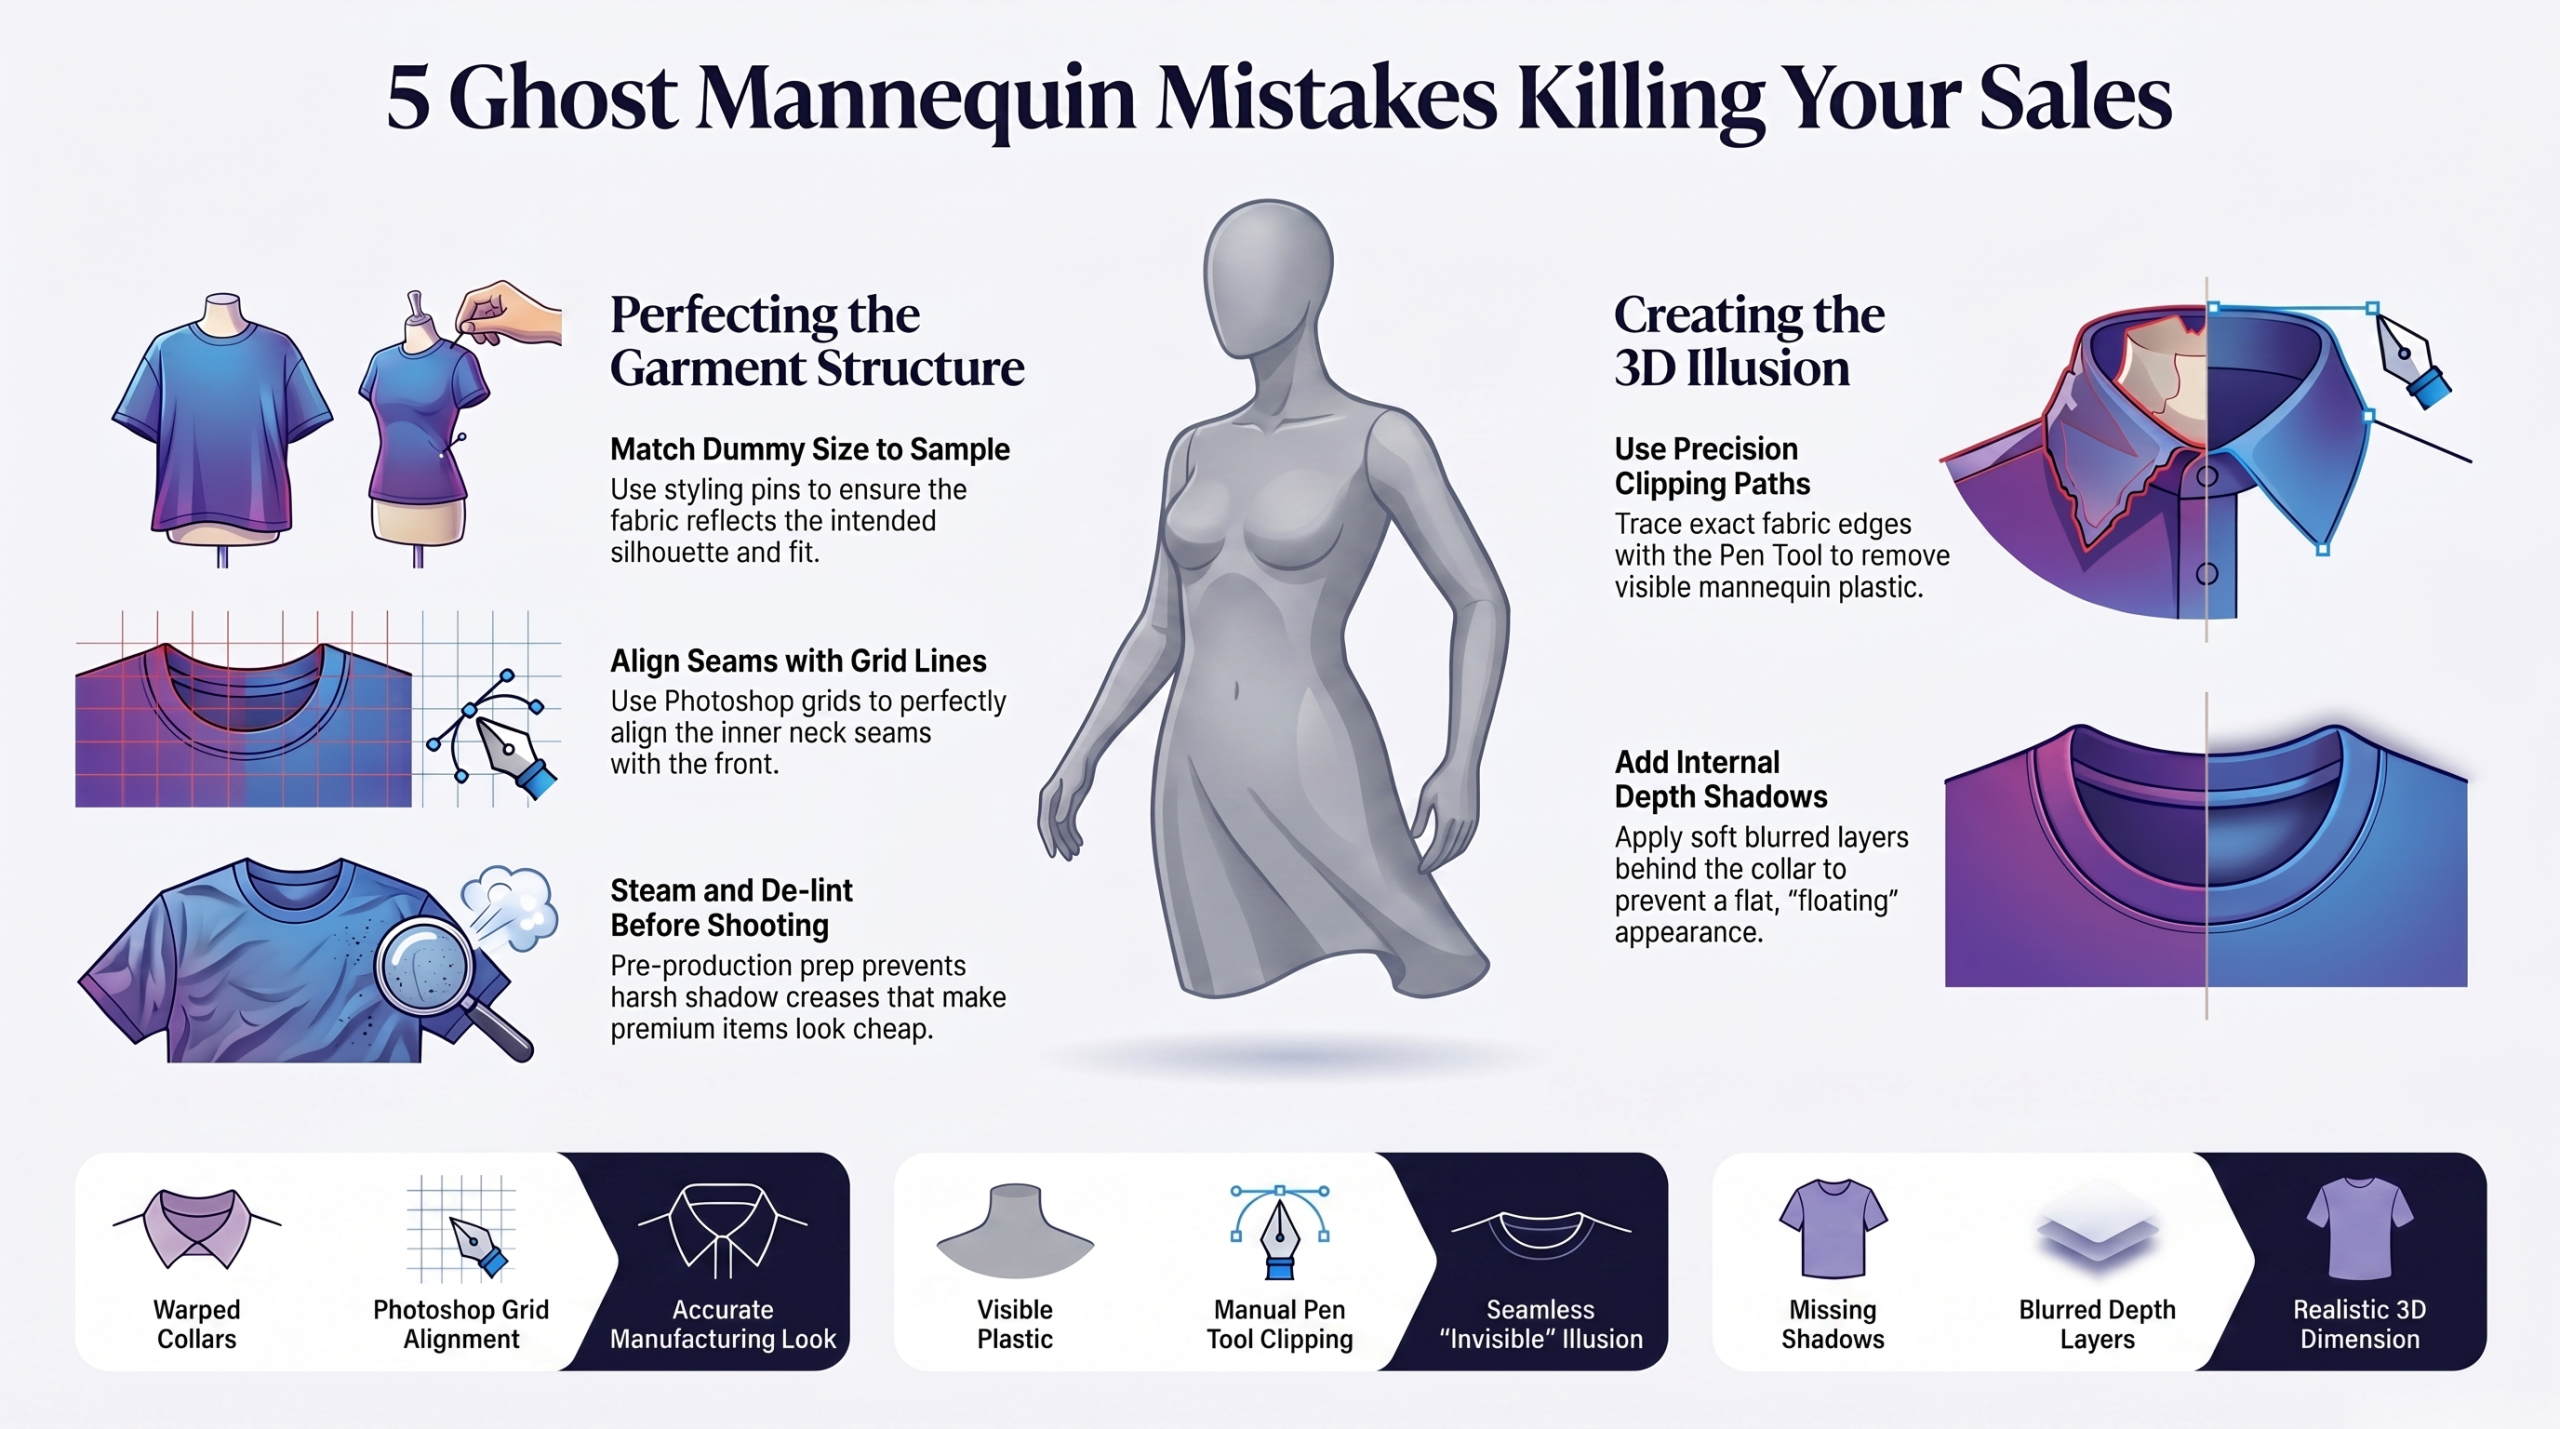
Common Ghost Mannequin Photography Mistakes
Even seasoned teams stumble. Here are the five most frequent errors and how to avoid them.
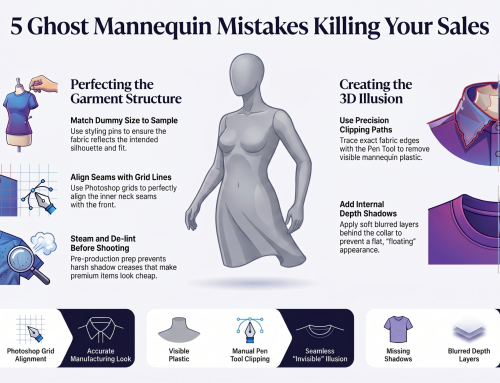
- Poor garment preparation. Wrinkles, visible tags, and misaligned seams cannot be fixed in Photoshop. Steam every piece. Remove every tag. Pin from behind.
- Inconsistent lighting. Light must be identical across every frame. One mismatched exposure and the composite looks fake.
- Bad camera positioning. Too high and the garment looks shrunken. Too low and it appears baggy. Lock the tripod. Measure the distance. Keep it consistent.
- Sloppy compositing. Rushed masking leaves jagged edges and visible mannequin remnants. Manual Pen Tool work still beats AI auto-cutouts for precision.
- Ignoring color accuracy. What looks red on your monitor might read as orange on a shopper’s phone. Use color-calibrated monitors and always export to SRGB.
Avoid these, and your ghost mannequin images will carry the quiet polish of a premium brand.
Should You DIY or Hire a Professional?
This question depends on three things: volume, budget, and quality threshold.
For a handful of products, DIY is feasible. You need a decent camera, a tripod, a mannequin with detachable parts, soft studio lighting, and proficiency in Photoshop. Tutorials abound. The learning curve is real but not insurmountable.
For anything beyond ten SKUs, professional ghost mannequin editing services become the smarter path. The math is simple. DIY editing might take 30–45 minutes per image. A professional editor can process 50+ images in a batch with tighter masking, better color, and faster turnaround. At scale, outsourcing costs less than your own time.
Look for a provider that specializes exclusively in fashion ecommerce retouching. Ask about their quality control process. Request a free sample edit. The best services offer same-day or 24-hour turnaround, bulk FTP upload, and a clear rejection policy if the work doesn’t meet your standards.
Conclusion
Ghost mannequin photography is not just a technique it is a strategic asset. It bridges the gap between the sterile flat lay and the expensive model shoot, delivering clean, three dimensional product images that build buyer confidence and drive measurable sales results. Whether you choose to learn ghost mannequin editing yourself or partner with a dedicated service, the outcome is the same: apparel images that sell. And in the crowded world of online fashion, that is the only metric that matters.
Frequently Asked Questions
- What is ghost mannequin photography?
Ghost mannequin photography is a product imaging method where apparel is shot on a mannequin and the mannequin is digitally removed in post-production. The result is a 3D, floating-garment effect that shows shape, fit, and interior detail without any visual distraction.
- How much does ghost mannequin editing cost per image?
Pricing ranges from
0.50 to 120 per image. Editing-only services typically charge
0.50–4.00, while full-service studios in the US or UK charge
60–120 for a complete shoot-and-edit package. Volume discounts are standard.
- What is the difference between ghost mannequin and flat lay photography?
Ghost mannequin photography creates a 3D, body-worn look that shows fit and structure. Flat lay is a 2D overhead shot that works well for texture, color, and social media content but cannot communicate how a garment fits on a body.
- Can I do ghost mannequin photography myself?
Yes, with a camera, tripod, mannequin, soft lighting, and Photoshop skills, you can create ghost mannequin images in-house. However, for large catalogs or premium quality, professional editing services save significant time and produce more consistent results.
- What types of clothing benefit most from ghost mannequin photography?
Structured garments gain the most: blazers, jackets, dresses, denim, tailored shirts, and outerwear. Any item where fit, silhouette, and construction details influence a buying decision benefits from the ghost mannequin effect.