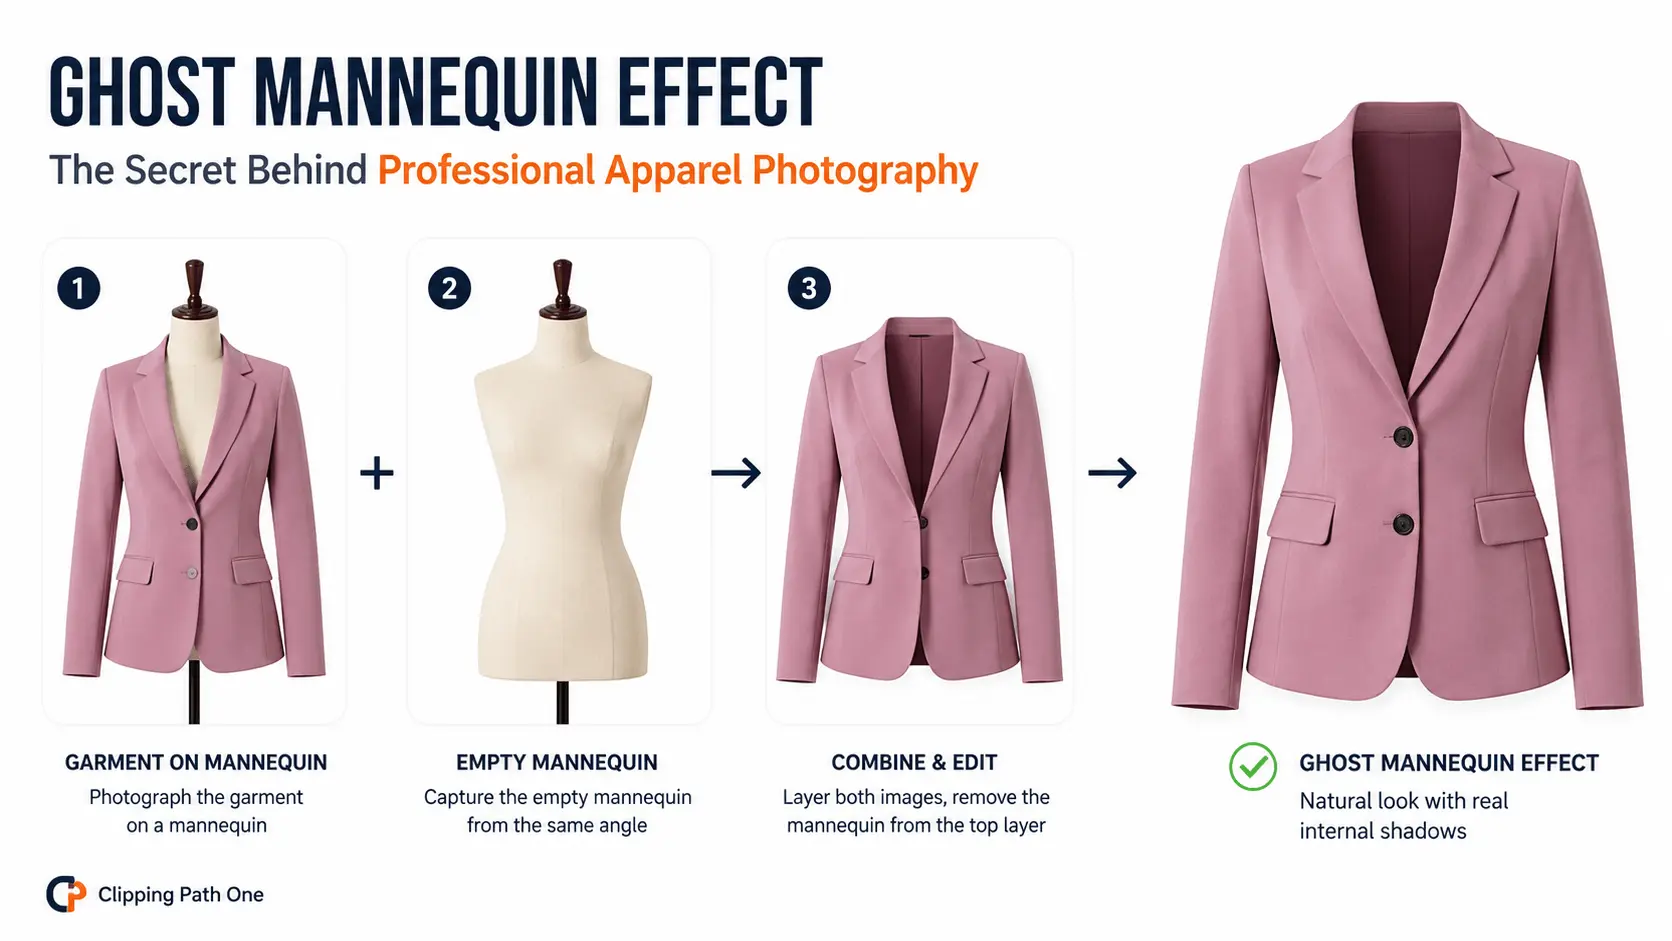
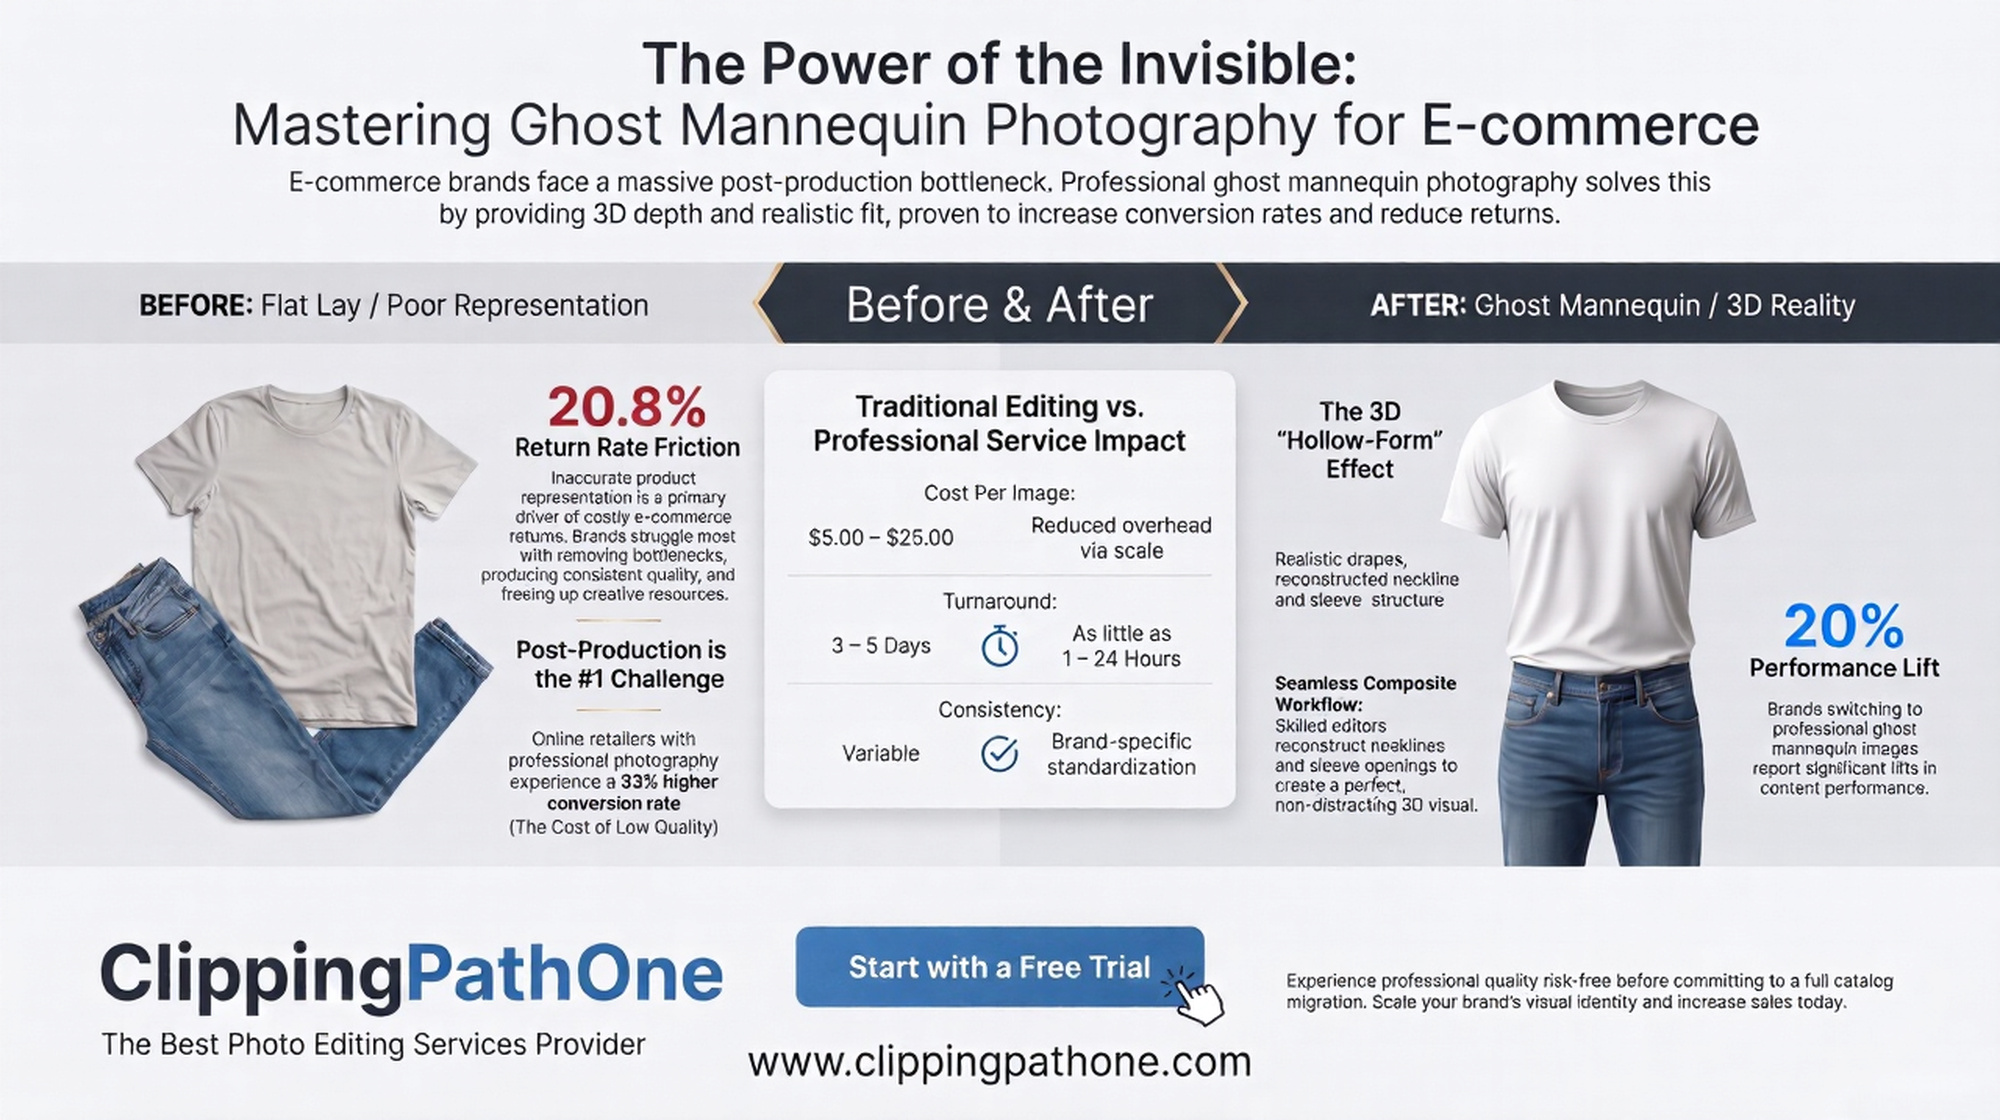
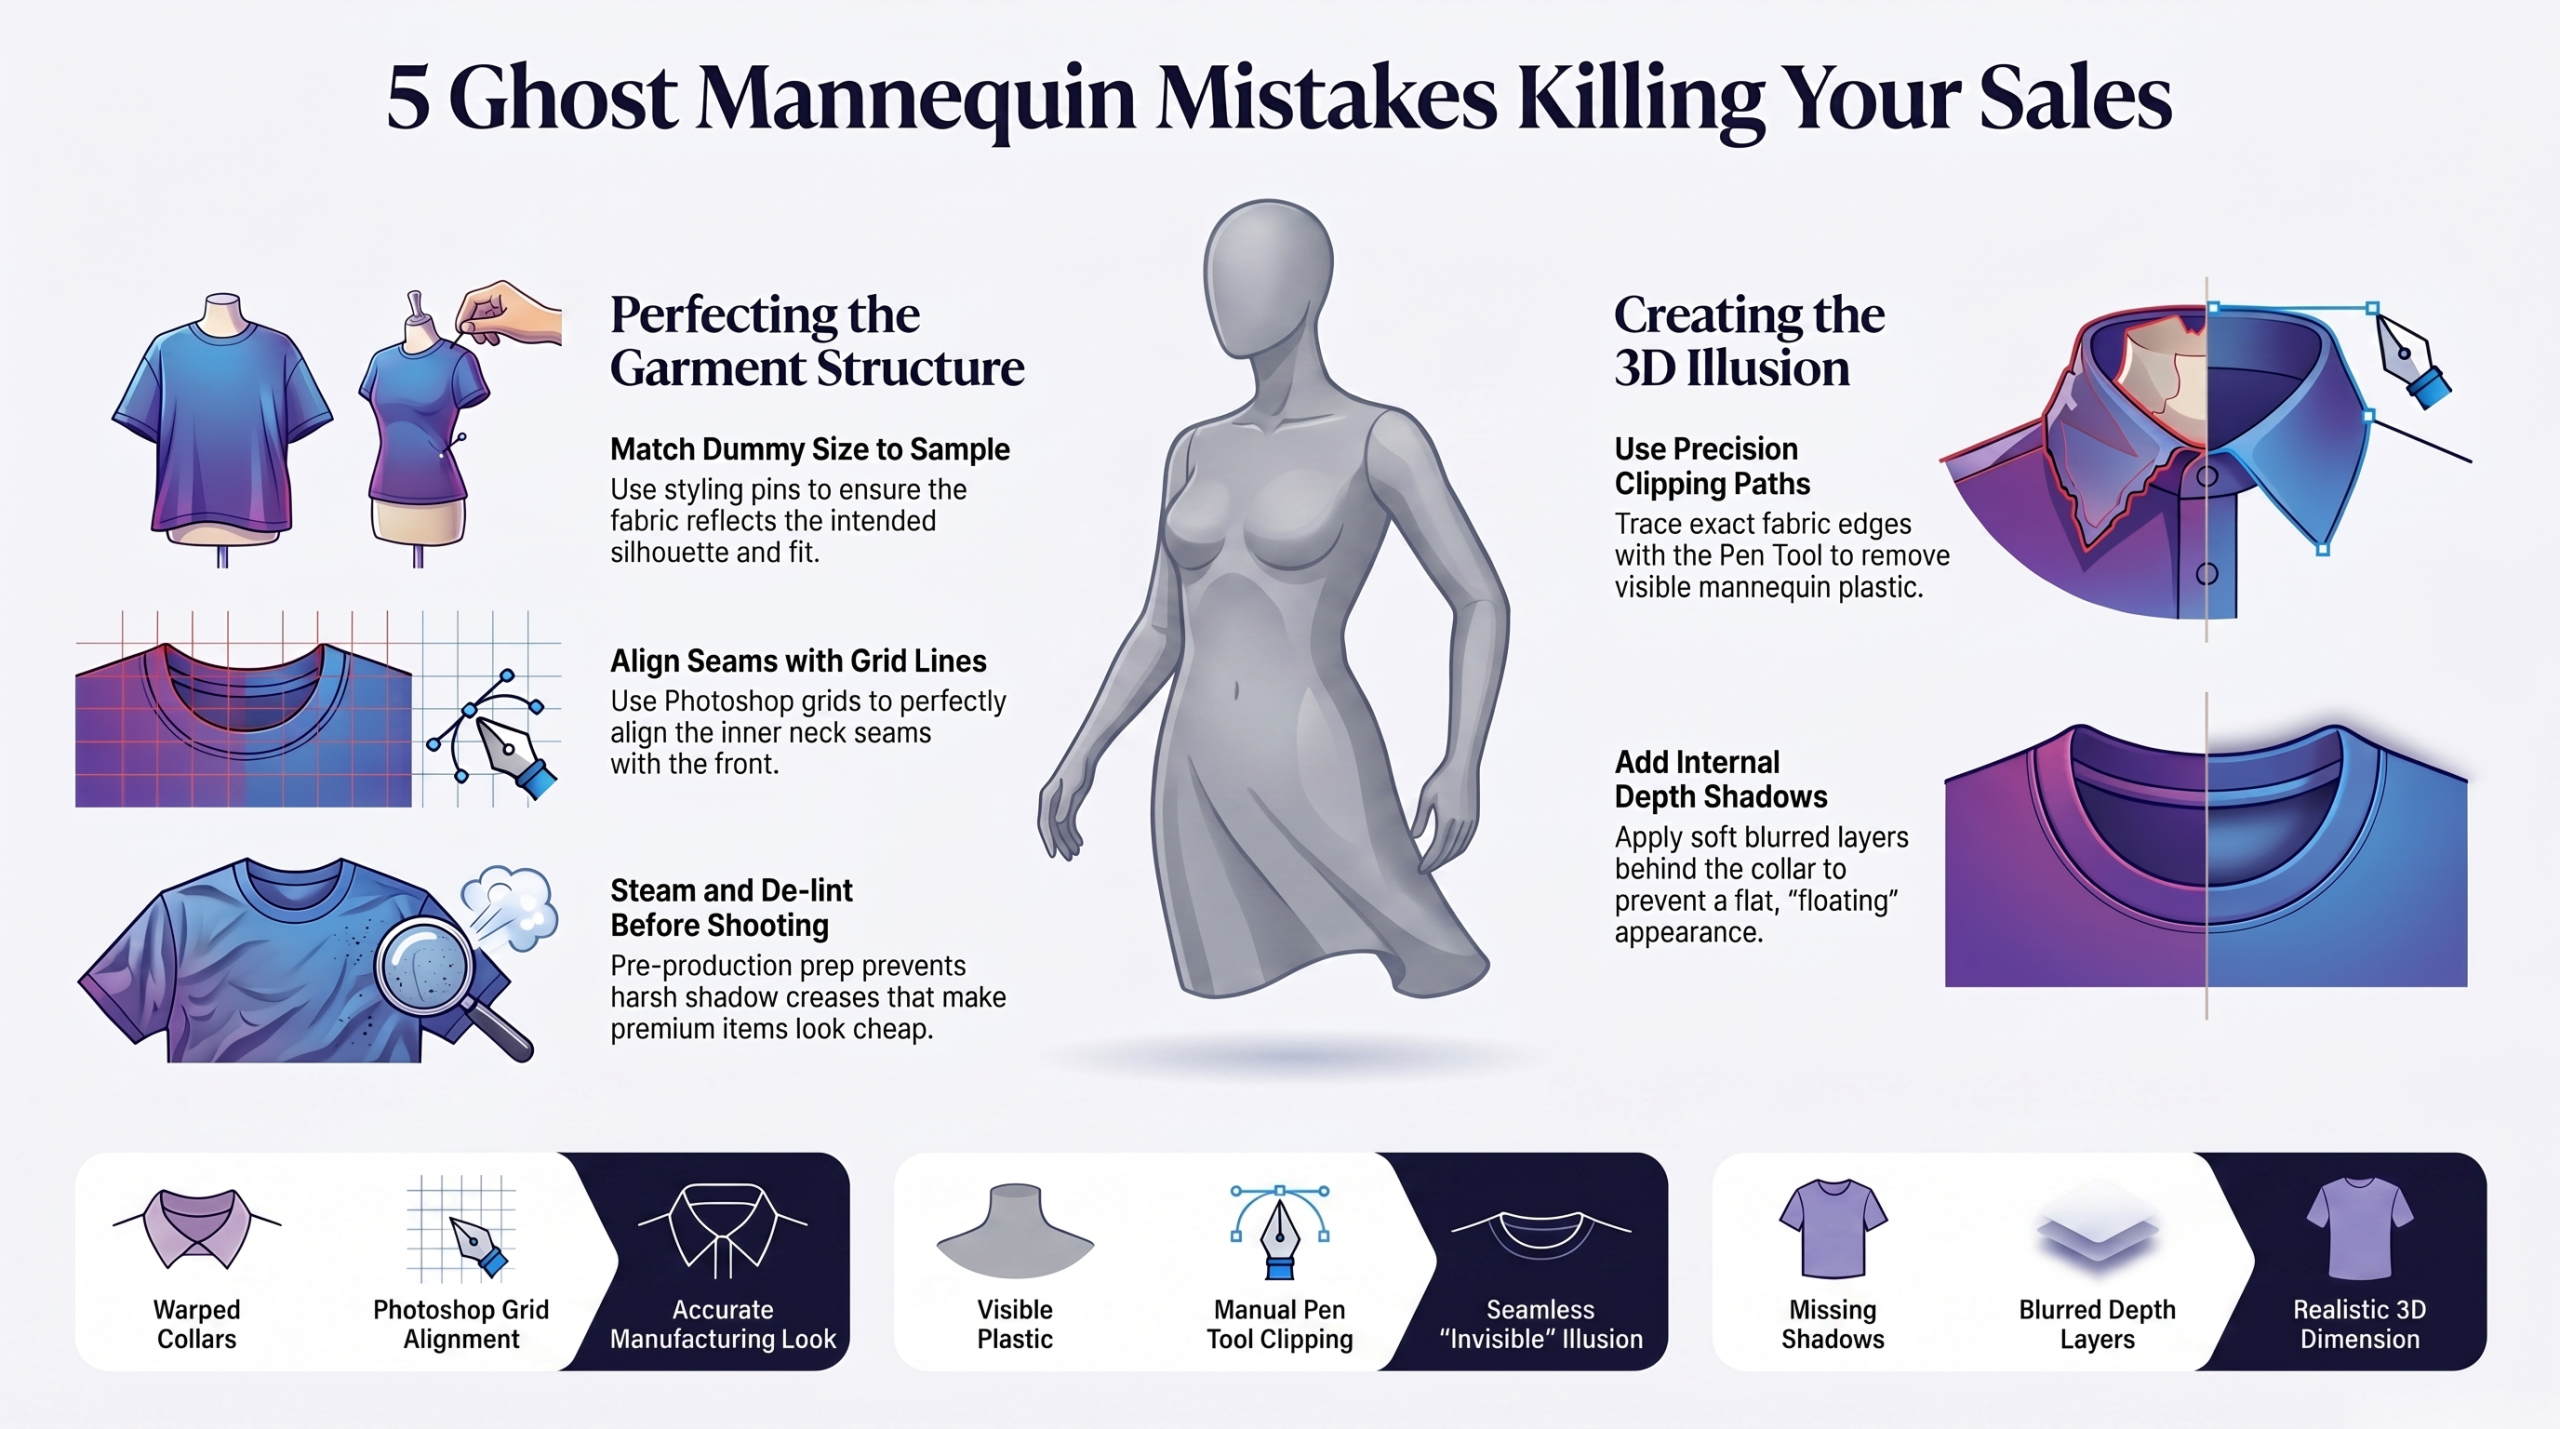
To photograph clothing for ghost mannequin effect, shoot the garment on a mannequin against a white background. Then capture the empty mannequin from the same angle. Layer both images in editing software. Remove the mannequin from the top layer. Add internal shadows inside openings.
Introduction: Why Mastering This Technique Matters
You want floating clothes. Not floating plastic bodies.
Learning how to photograph clothing ghost mannequin style separates amateur product shots from professional e-commerce imagery. Get this right, and your garments look like they’re suspended in midair three dimensional, inviting, and distraction-free.
Here’s the hard truth: Most tutorials skip the critical details. They show you the “what” but not the “why” This guide changes that. No fluff. Just a pro-level setup that works every single time.
So, grab your camera. Let’s build a ghost mannequin photography workflow that actually delivers.
What Is Ghost Mannequin Photography? A Quick Refresher
Ghost mannequin photography removes the display form from clothing images while preserving the garment’s natural shape.
Think of it as a visual magic trick. The mannequin disappears. The clothes remain perfectly formed. Collars keep their structure. Sleeves don’t collapse. And customers only see the product never the prop.
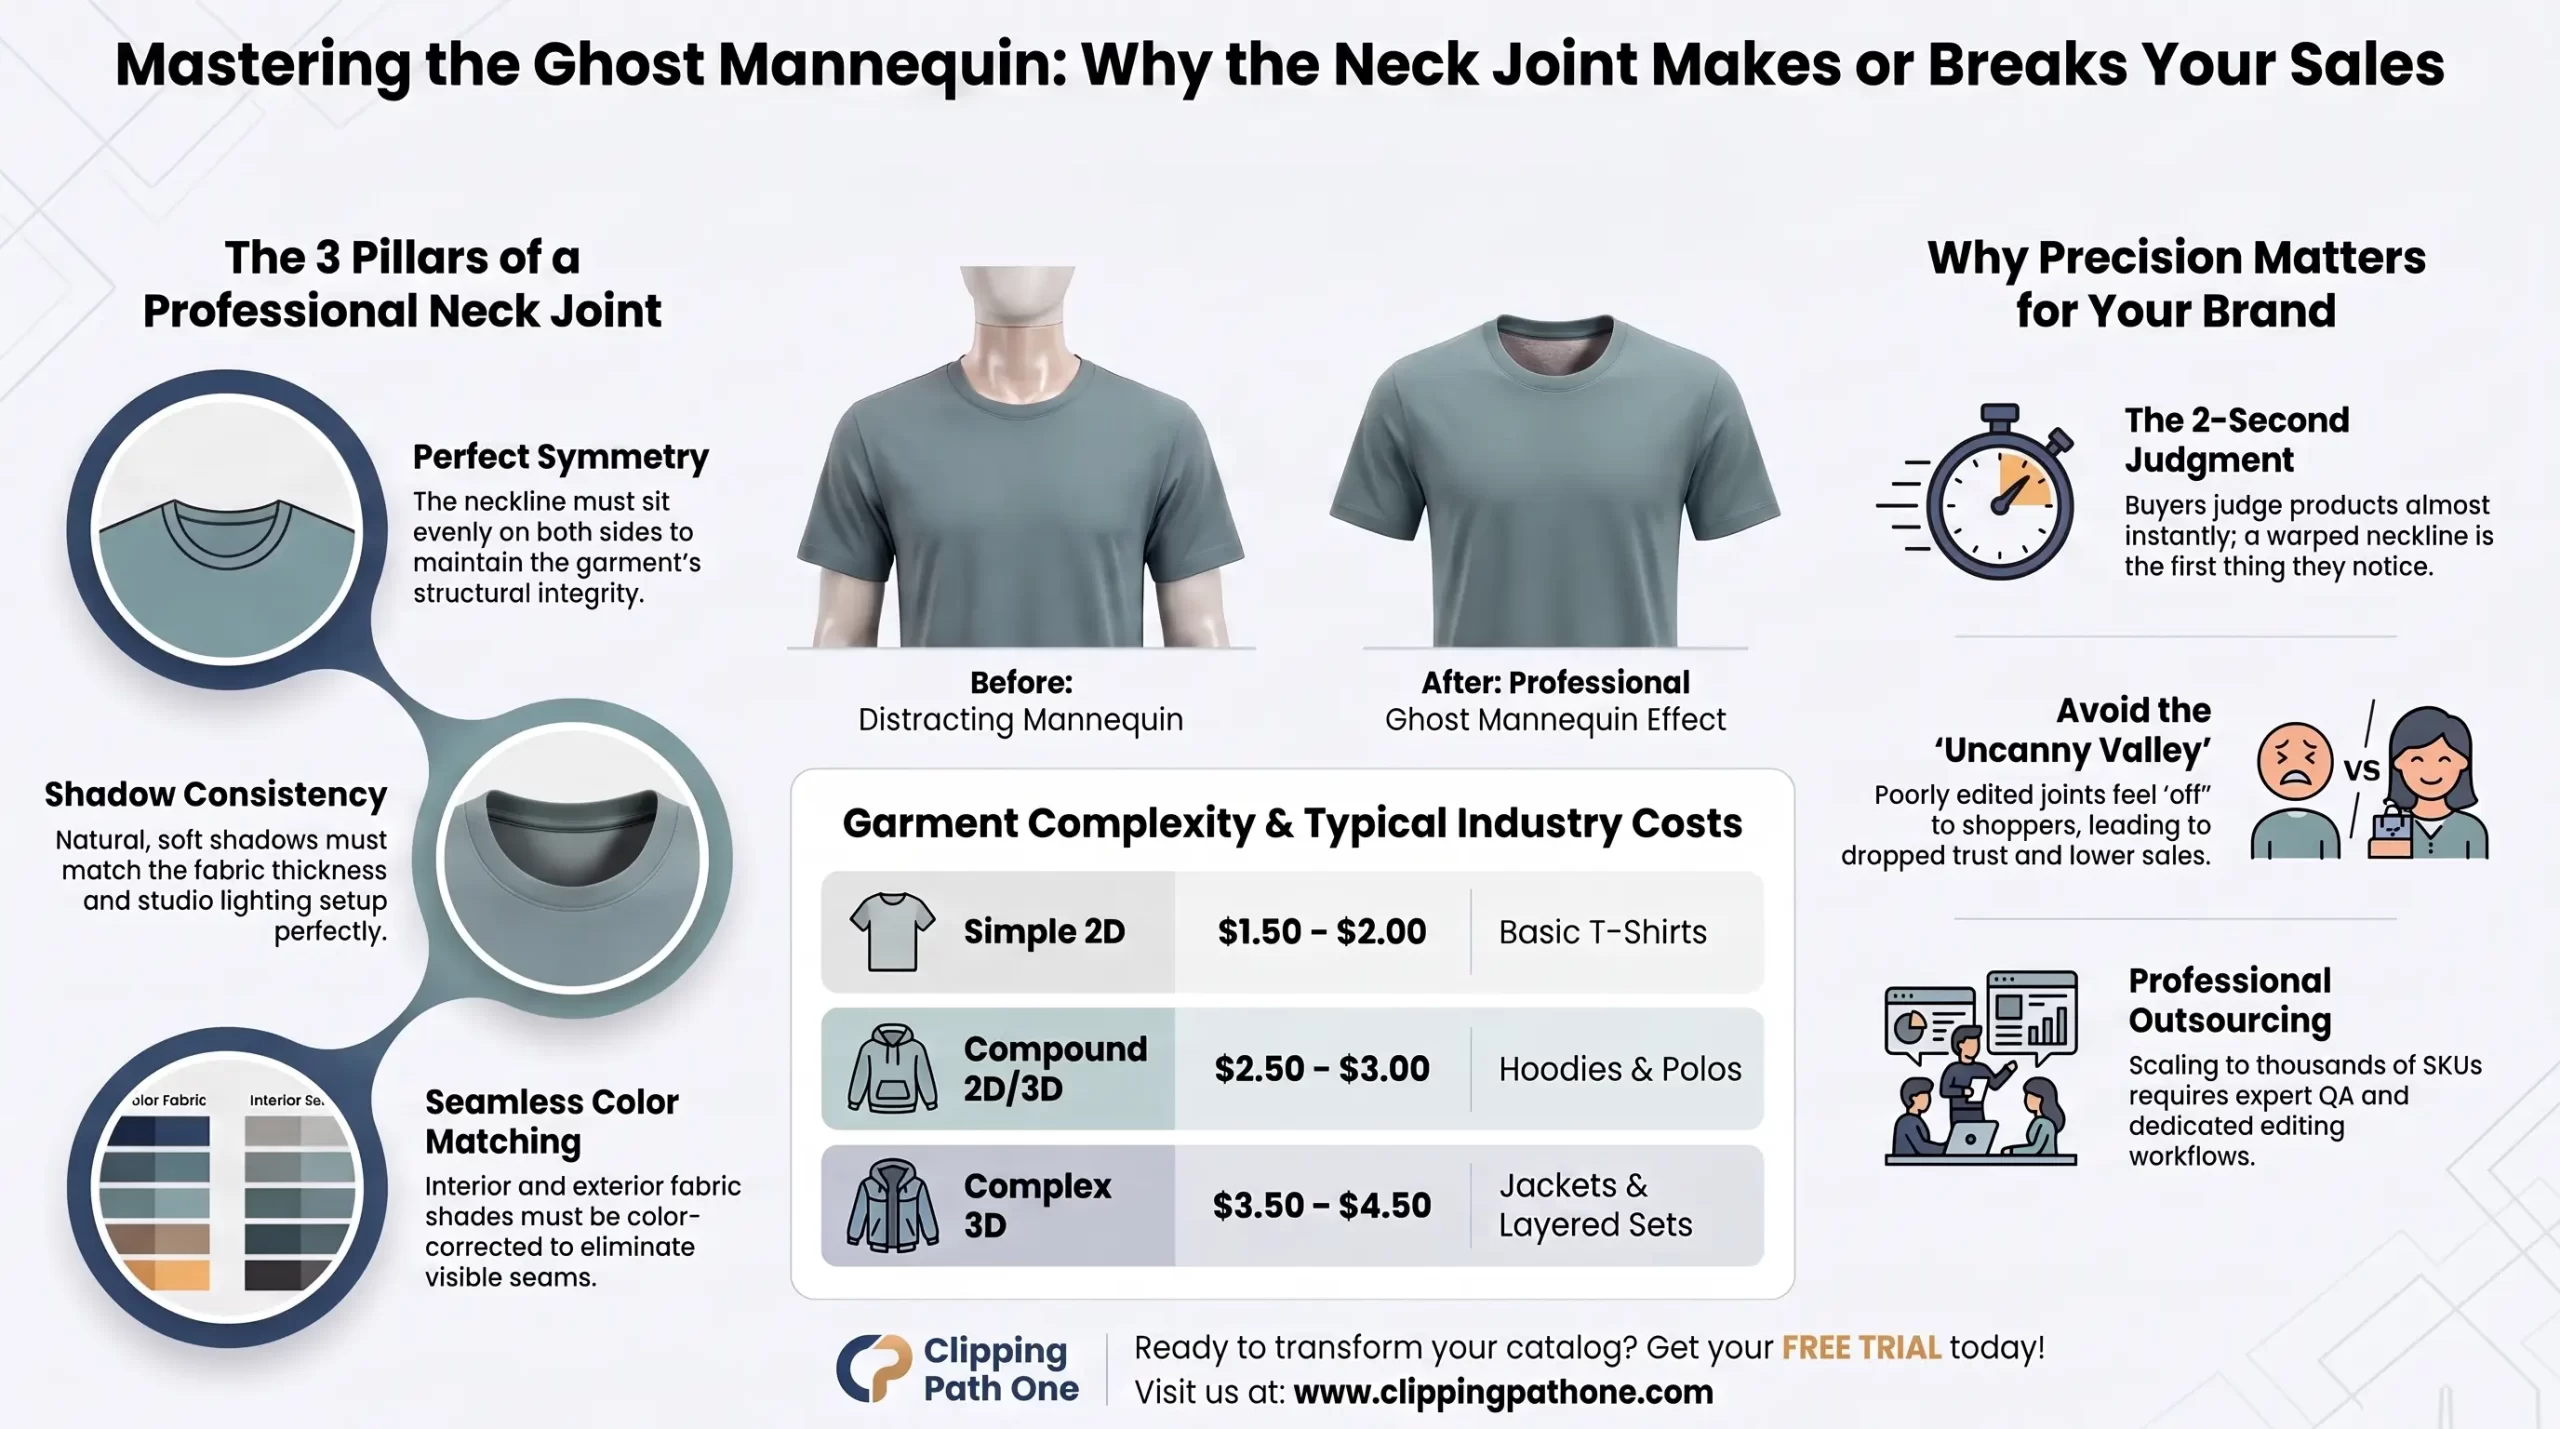
The ghost mannequin technique relies on two key elements: consistent camera positioning and careful internal shadowing. Miss either one, or the illusion shatters.
What Equipment Do You Need to Photograph Clothing Ghost Mannequin?
Let me save you money. You don’t need a $5,000 studio.
Essential Gear Under $300 Total
| Item | Why It Matters | Budget Pick |
| Mannequin (female ghost mannequin preferred) | Holds garment shape | $80-150 on Amazon |
| White seamless backdrop | Clean background for easy removal | $30 paper roll |
| Two softbox lights | Even, shadow-free illumination | $120 kit |
| Tripod | Absolute camera position consistency | $40 |
| Camera or smartphone | 12MP minimum | (you already own this) |
Pro tip: A female ghost mannequin with adjustable shoulders works best for dresses, blouses, and outerwear. Male forms suit shirts and jackets.
What About the Ghost Mannequin App Option?
Yes, you can skip the camera entirely. A ghost mannequin app like PhotoRoom or Pixelcut automates much of the process. But here’s the catch automated tools struggle with complex fabrics. Lace, sequins, and sheer materials need human precision.
Use a ghost mannequin app free version for quick tests. For professional results, shoot manually.
How to Set Up Your Studio for Ghost Mannequin Product Photography
Set it once. Shoot forever.
Step 1: Position Your Female Ghost Mannequin
Place the mannequin three feet from the backdrop. This distance prevents shadows from hitting the white paper.
Center the mannequin in your frame. Leave 20% empty space around the garment for cropping flexibility.
Step 2: Light Like a Pro
Two-light setup works perfectly for ghost mannequin product photography:
- Light one: 45 degrees to the left of camera
- Light two: 45 degrees to the right of camera
- Height: Light center aligned with garment chest level
Why this configuration? Even lighting means no harsh shadows on the mannequin. And when shadows disappear, editing becomes dramatically easier.
Step 3: Lock Down Your Camera
Mount your camera on a tripod. This is non-negotiable.
Dial in these settings:
- Aperture: f/8 to f/11 (everything stays sharp)
- ISO: 100 to 200 (no grain)
- Shutter speed: 1/125 or faster
- White balance: Custom or daylight (5500K)
Critical rule: Never change camera position or settings between shots. Your before and after frames must align perfectly.
How to Photograph Clothing Ghost Mannequin: The Step-by-Step Shoot
This is where the magic happens. Follow these exact steps.
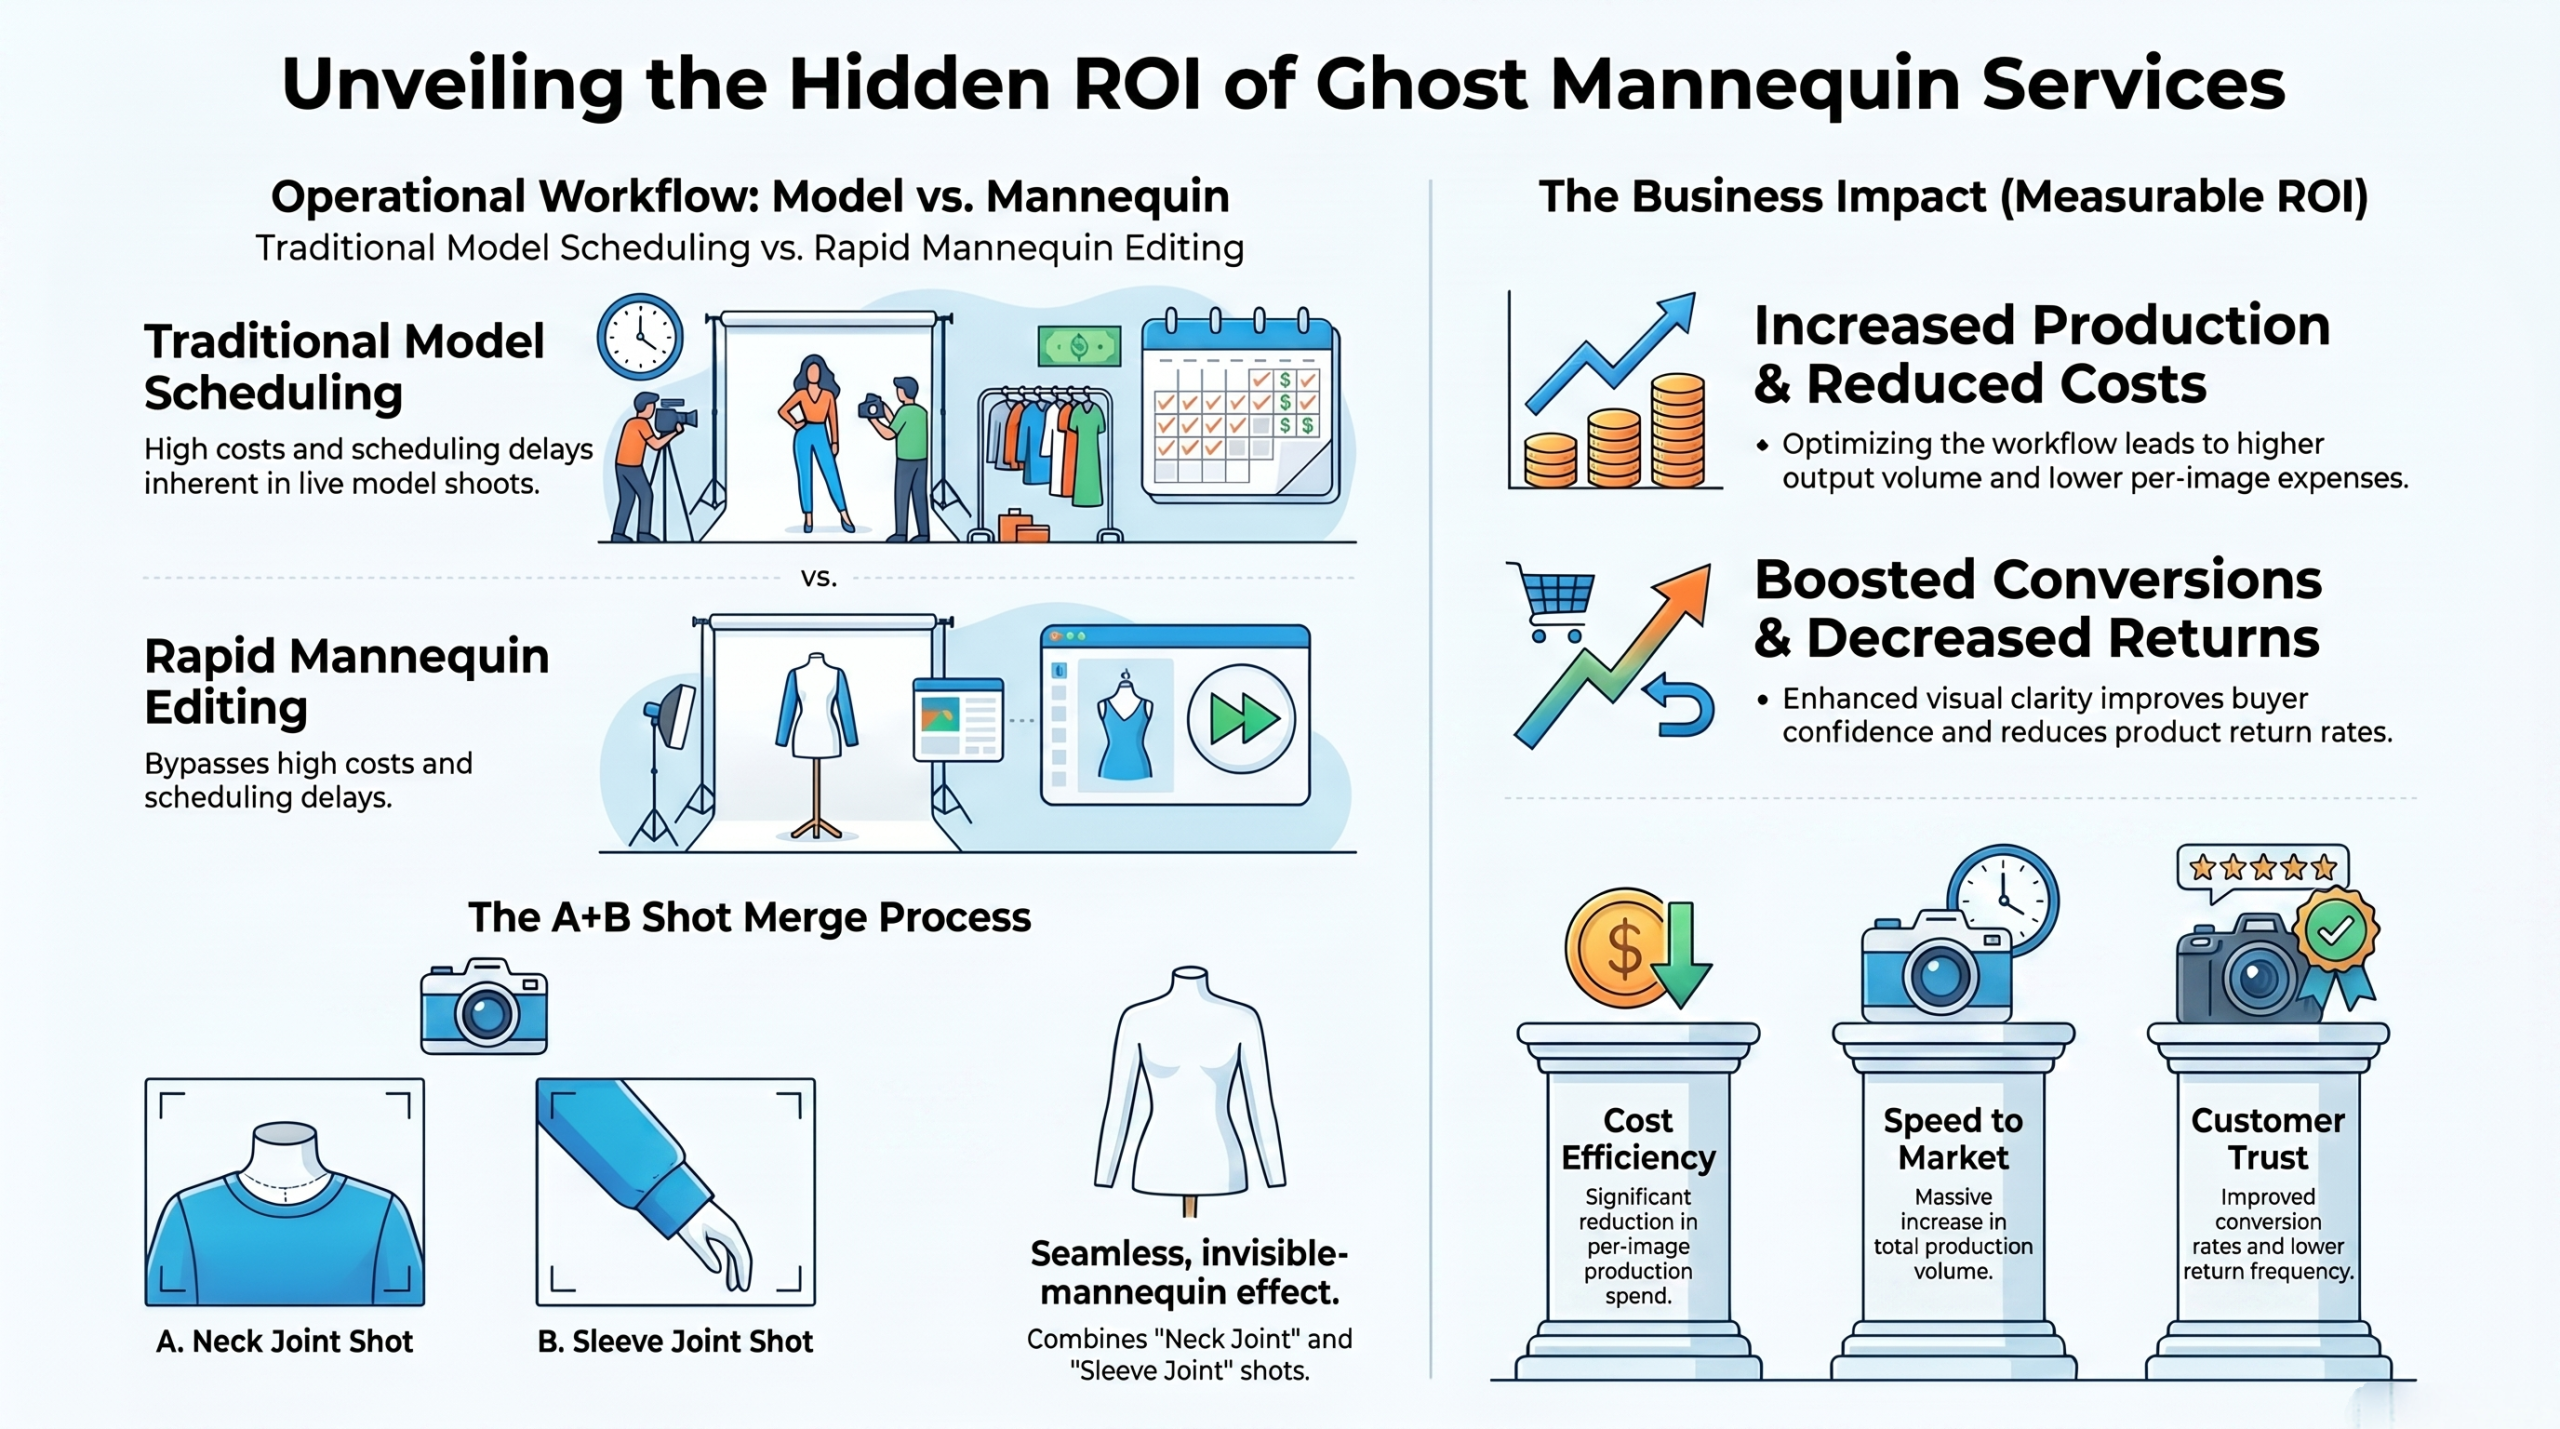
Shot 1: Garment on Mannequin
Dress the mannequin completely. Smooth all wrinkles. Tuck in any loose fabric.
Take your first photo. Check these three things:
- Is the garment centered?
- Are both sleeves visible?
- Is the collar standing naturally?
Good. Now don’t move anything.
Shot 2: The Empty Mannequin (Invisible Support)
Remove the garment carefully. Keep the mannequin exactly where it stands.
Shoot the bare mannequin from the identical angle.
Why this matters: When you layer these two photos, the empty mannequin provides the background texture behind where the garment used to be. No cloning. No guesswork.
Shot 3: Internal Openings the Secret Layer
For complex garments like jackets or hoodies, take a third shot:
- Turn the garment inside out
- Photograph the neck hole and arm openings
- Capture the lining texture
This shot gives you real fabric to composite inside the openings. The result looks infinitely more authentic than painted shadows.
How to Take Pictures of Clothes Without a Mannequin Alternative Method
No mannequin? No problem.
How to take pictures of clothes without mannequin using the “flat lay with stuffing” technique:
- Lay the garment on a flat white surface
- Stuff the sleeves and body with white tissue paper
- Photograph from directly above
- Edit out the tissue paper in post
This works well for t-shirts, sweaters, and casual wear. But honestly? You lose the 3D drape. A proper mannequin gives you better results every time.
The Editing Workflow: How to Do Ghost Mannequin Photography in Post
Shooting is half the battle. Editing wins the war.
Using Ghost Mannequin Photoshop Manual Method
Open both images in Photoshop. Follow this sequence:
- Layer the empty mannequin as the background layer
- Place the garment shot on top
- Add a layer mask to the garment layer
- Paint black on the mask to hide the mannequin body
- Reveal the background beneath
For internal openings: Create a new layer. Paint soft black gradients inside neck holes and arm openings. Set opacity to 15-25%. Blend mode to Multiply.
This creates depth. The opening looks hollow not like a flat paper cutout.
Using Ghost Mannequin AI Tools Faster but Flawed
Ghost mannequin AI services like Remove.bg or Claid.ai process images in seconds. Upload. Download. Done.
But here’s what AI misses:
- Consistent internal shadows across a product line
- Sheer fabric transparency
- Complex layered garments jackets with hoods
My honest advice: Use AI for volume work 500+ simple t-shirts. Use manual ghost mannequin Photoshop for premium products.
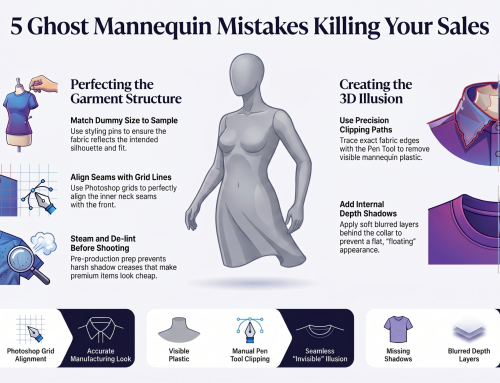
Common Mistakes When Learning How to Photograph Clothing Ghost Mannequin for Beginners
I’ve seen these errors ruin hundreds of shoots. Don’t repeat them.
Mistake 1: Inconsistent Camera Position
You moved the tripod between shots. Now the mannequin doesn’t align. Fix: Lock your tripod. Use tape marks on the floor.
Mistake 2: Harsh Lighting
Single light source creates sharp shadows on the mannequin. Those shadows become impossible to remove. Fix: Use two soft boxes. Diffuse everything.
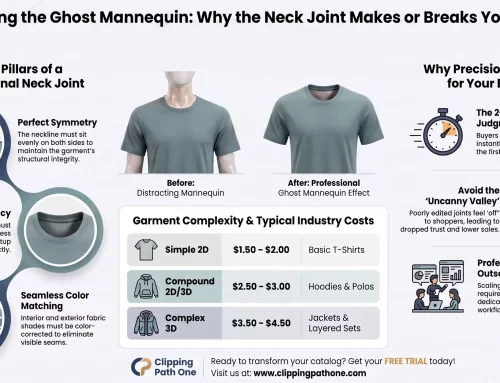
Mistake 3: Forgetting Internal Shadows
Your garment floats. But the neck hole looks like a white void. Customers notice. Fix: Add those dark gradients inside every opening.
Mistake 4: Shooting Against Gray Backdrops
Gray doesn’t give you a clean key. White does. Fix: Use white seamless paper. Overexpose the background slightly blow it too pure white.
Pro Tips from a Commercial Photographer
I asked Elena Vasquez, a product photographer with over 8,000 e-commerce shoots under her belt. Here’s what she said about clothing photography ghost mannequin:
“The biggest upgrade you can make? Buy a mannequin with removable limbs. Seriously. When you shoot armholes or necklines, take the limb off. Photograph the opening directly. Then composite it back. The precision is unmatched.”
Her exact workflow for difficult fabrics:
- Sheer blouses: Shoot with a nude underlayer (then remove both in post)
- Dark denim: Add extra light from below to illuminate the mannequin shape
- Patterned fabric: Use higher f-stop (f/16) to keep patterns sharp
Ghost Mannequin App vs. Manual: Which Should You Choose?
Let me break this down by your situation.
| Your Scenario | Best Choice | Why |
| 10-50 products monthly | Manual Photoshop | Better quality control |
| 200+ simple items weekly | AI or app | Speed wins |
| Luxury or complex garments | Manual with pro editor | No compromise |
| Testing a new brand | Ghost mannequin app free trial | Zero cost to start |
For most small brands: Learn how to photograph clothing ghost mannequin manually first. Understand the technique. Then automate later. You can’t fix what you don’t understand.
How to Do Ghost Mannequin Photography on a Budget Under $100
Short on cash? Here’s your minimalist setup.
- Mannequin: Borrow from a local boutique offer free product shots in exchange
- Backdrop: White foam board from dollar store $5
- Lighting: Two clamp lights with daylight LED bulbs $30
- Tripod: Use a stack of books
- Editing: GIMP free or Photopea browser-based
Results won’t match a pro studio. But for a beginner learning how to photograph clothing ghost mannequin? It’s enough. Upgrade as you grow.
FAQ: Ghost Mannequin Photography
What’s the difference between ghost mannequin and invisible mannequin?
Nothing. They’re identical terms. Both refer to removing the mannequin while keeping the garment’s 3D shape.
Can I use a ghost mannequin app free for professional work?
Yes, but expect limitations. Free apps limit resolution and add watermarks. Pay for pro versions $7-10/month for commercial use.
How long does it take to learn ghost mannequin photography?
Basic proficiency: 2-3 practice sessions. Professional consistency: 20-30 product shoots. Mastery: 100+ garments.
Do I need Photoshop specifically?
No. GIMP, Affinity Photo, and Photopea all work. The technique layers, masks, brushes transfers across software.
What’s the most common mistake beginners make?
Moving the camera between garment and empty mannequin shots. Lock that tripod down. Use tape. Never touch it until both frames are captured.
Conclusion: Your Next Steps to Master Ghost Mannequin Photography
Learning how to photograph clothing ghost mannequin isn’t rocket science. It’s discipline.
Set up your lights once. Lock your camera position. Shoot the garment. Remove the garment. Shoot the empty mannequin. Edit with precision. Add those internal shadows. Done.
Your action plans this week:
- Buy or borrow a female ghost mannequin
- Shoot three different garment types t-shirt, jacket, dress
- Edit using free trial of ghost mannequin app or Photoshop
- Compare your results to a professional example
