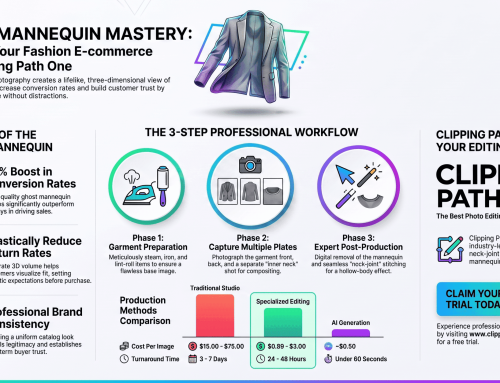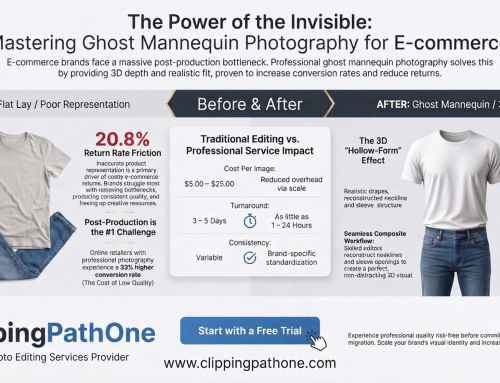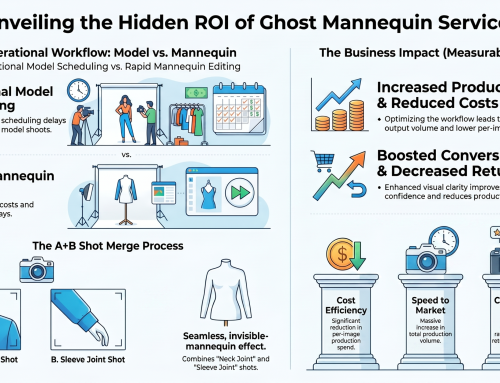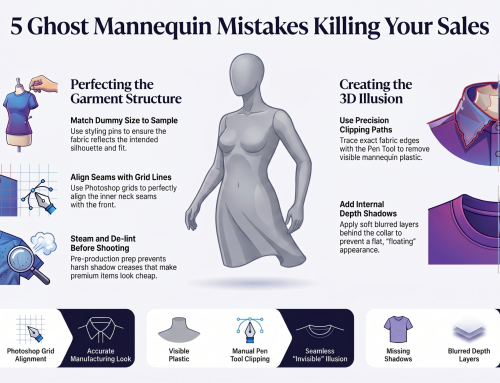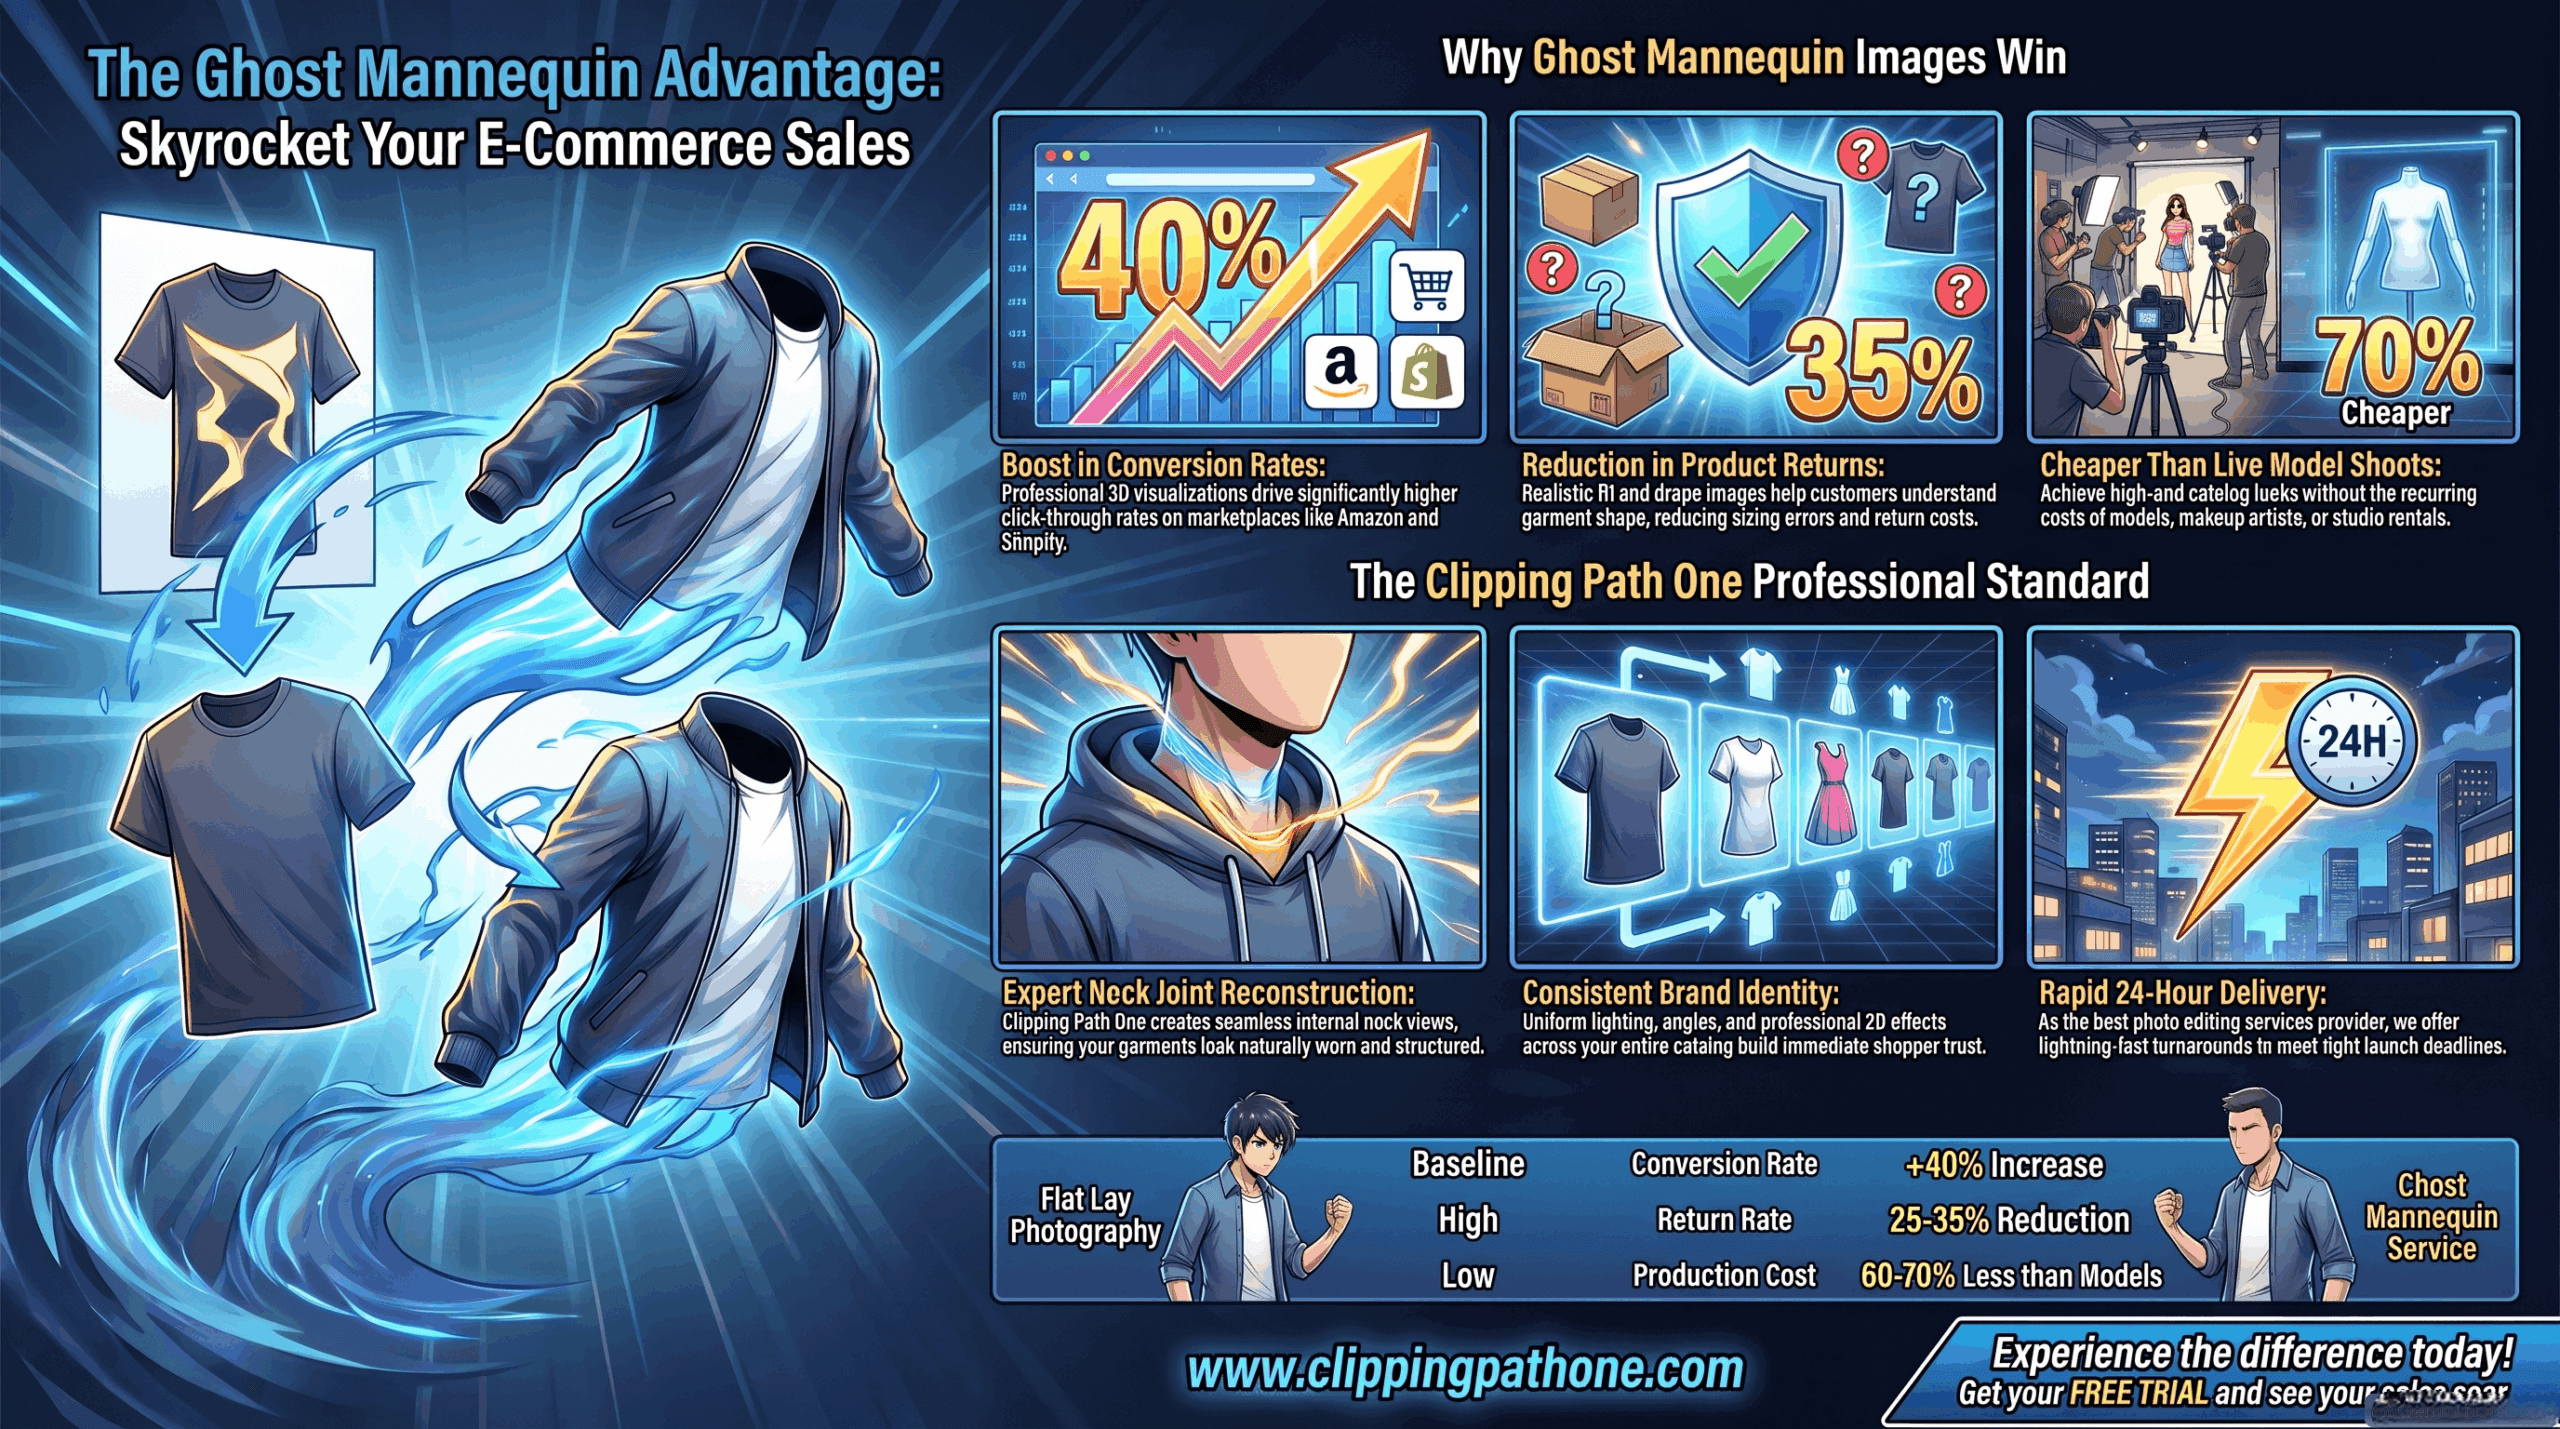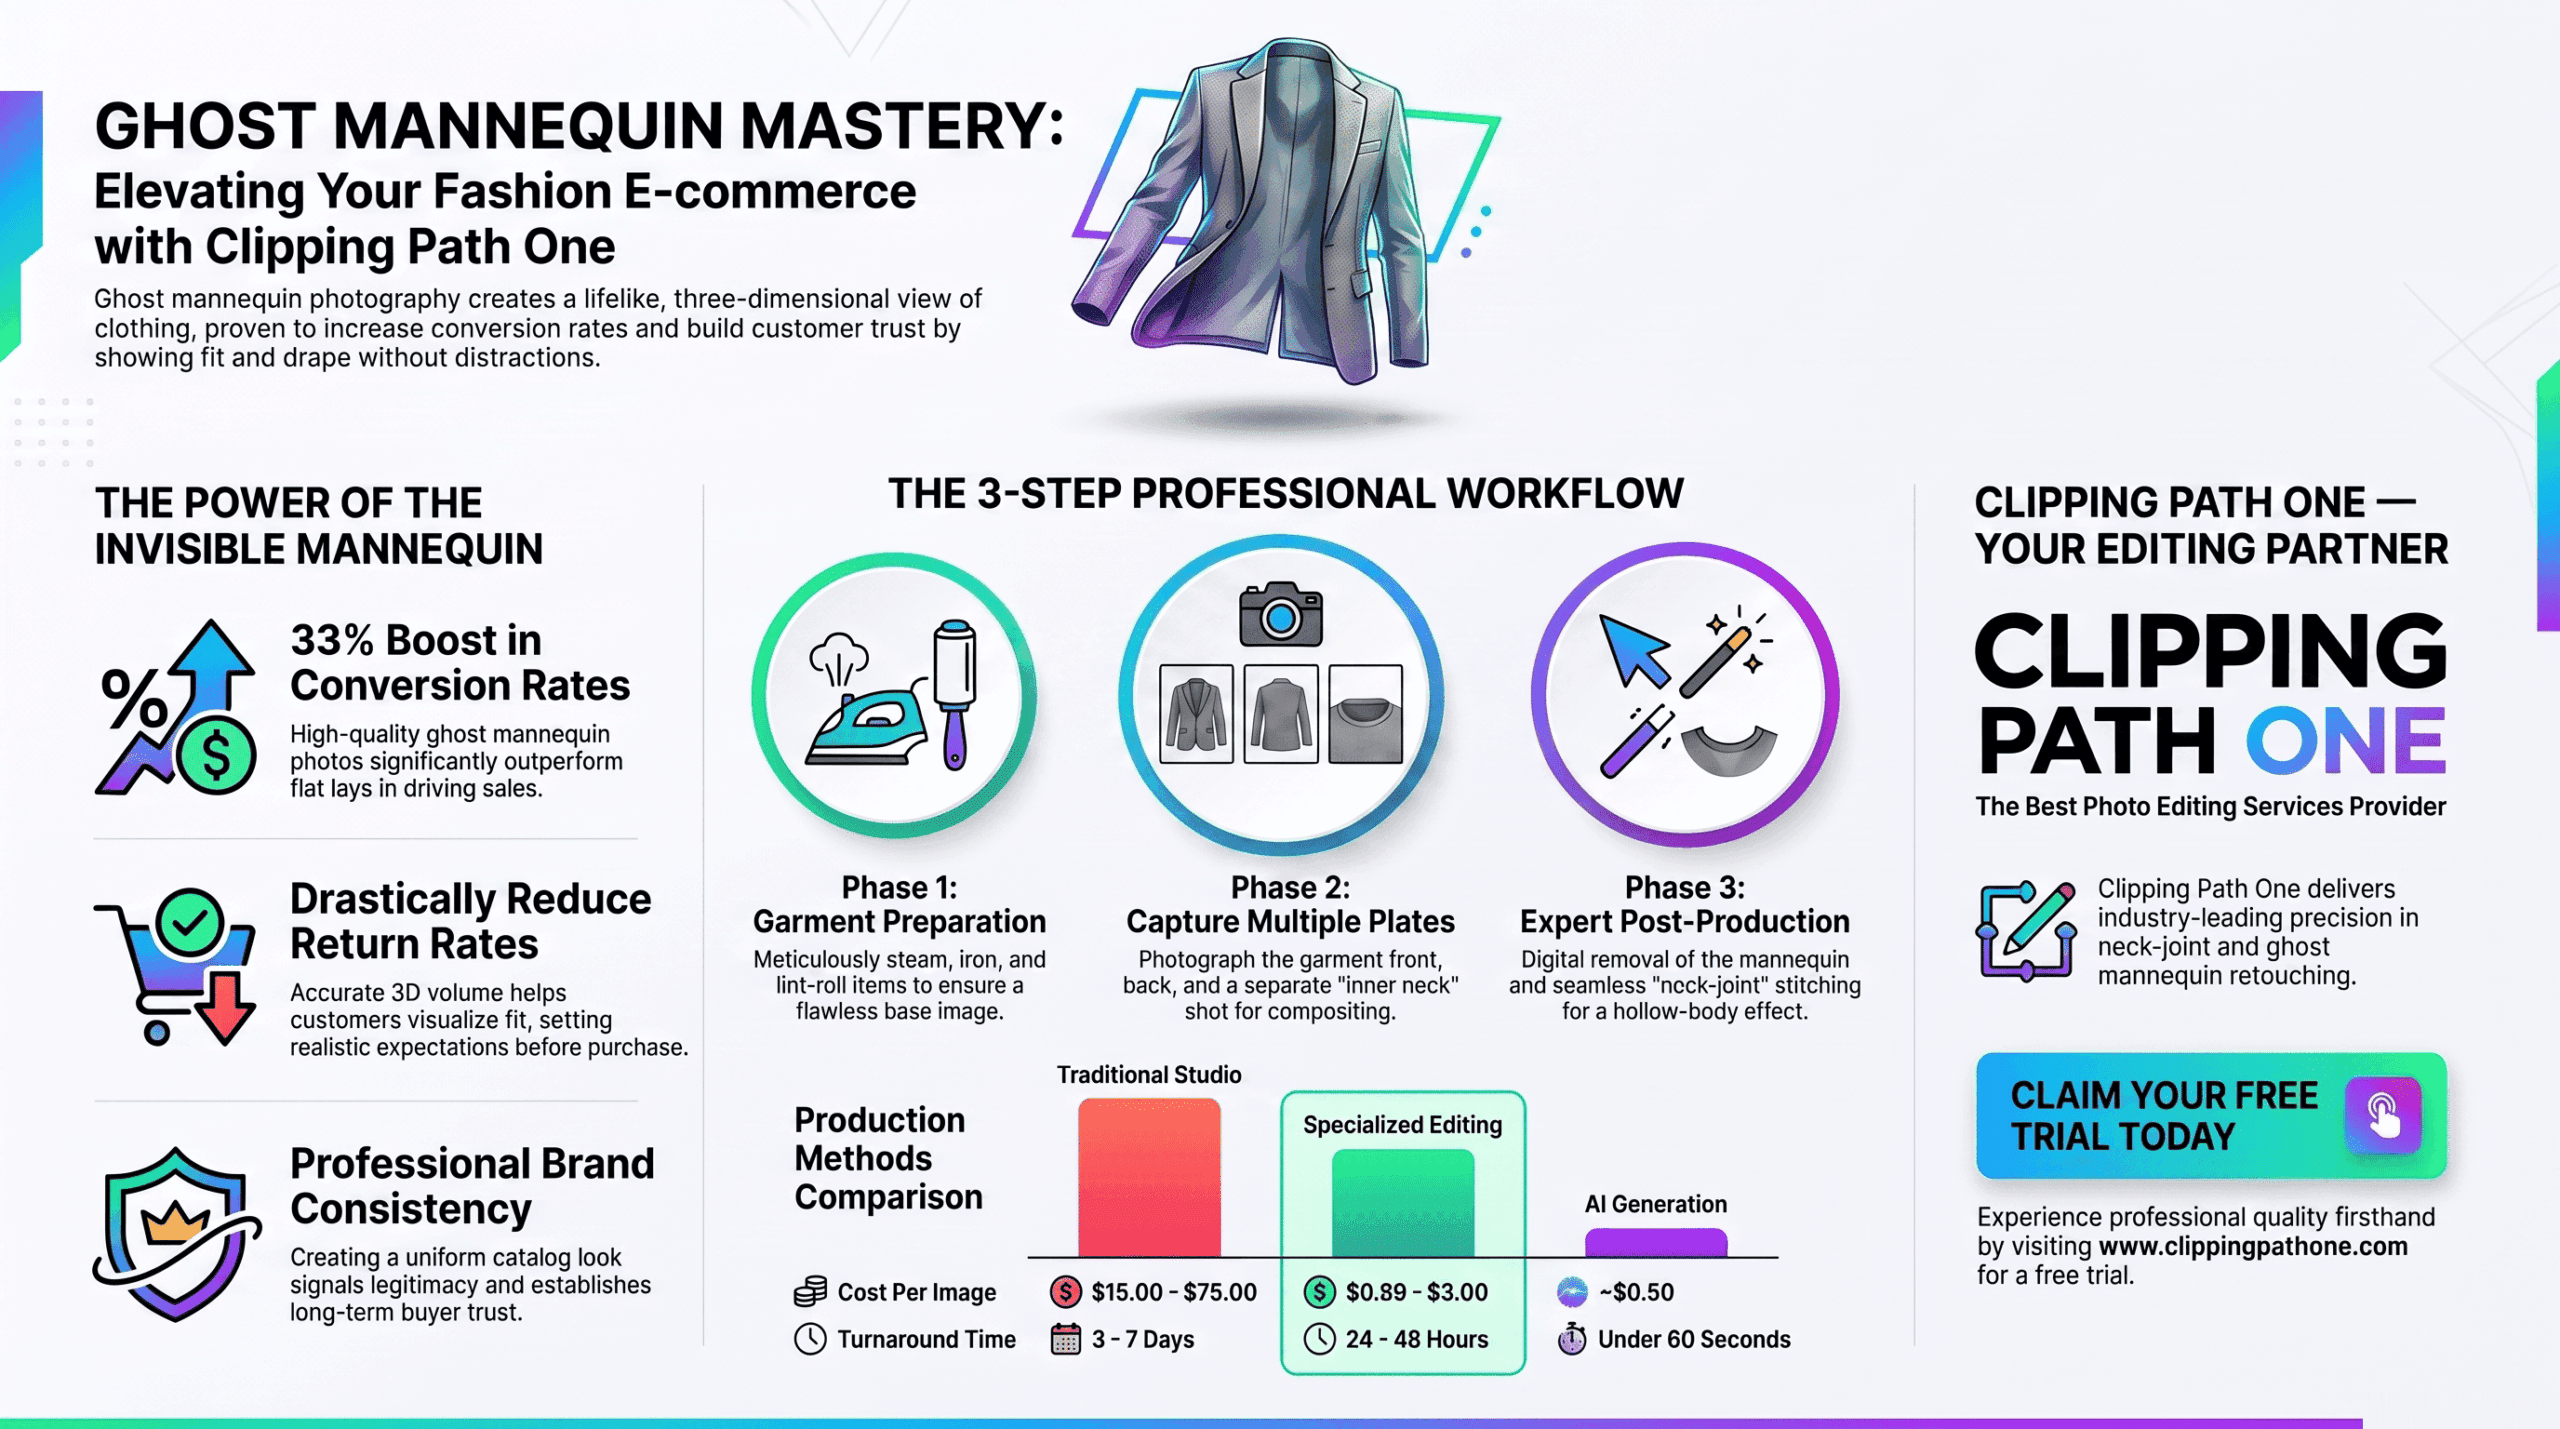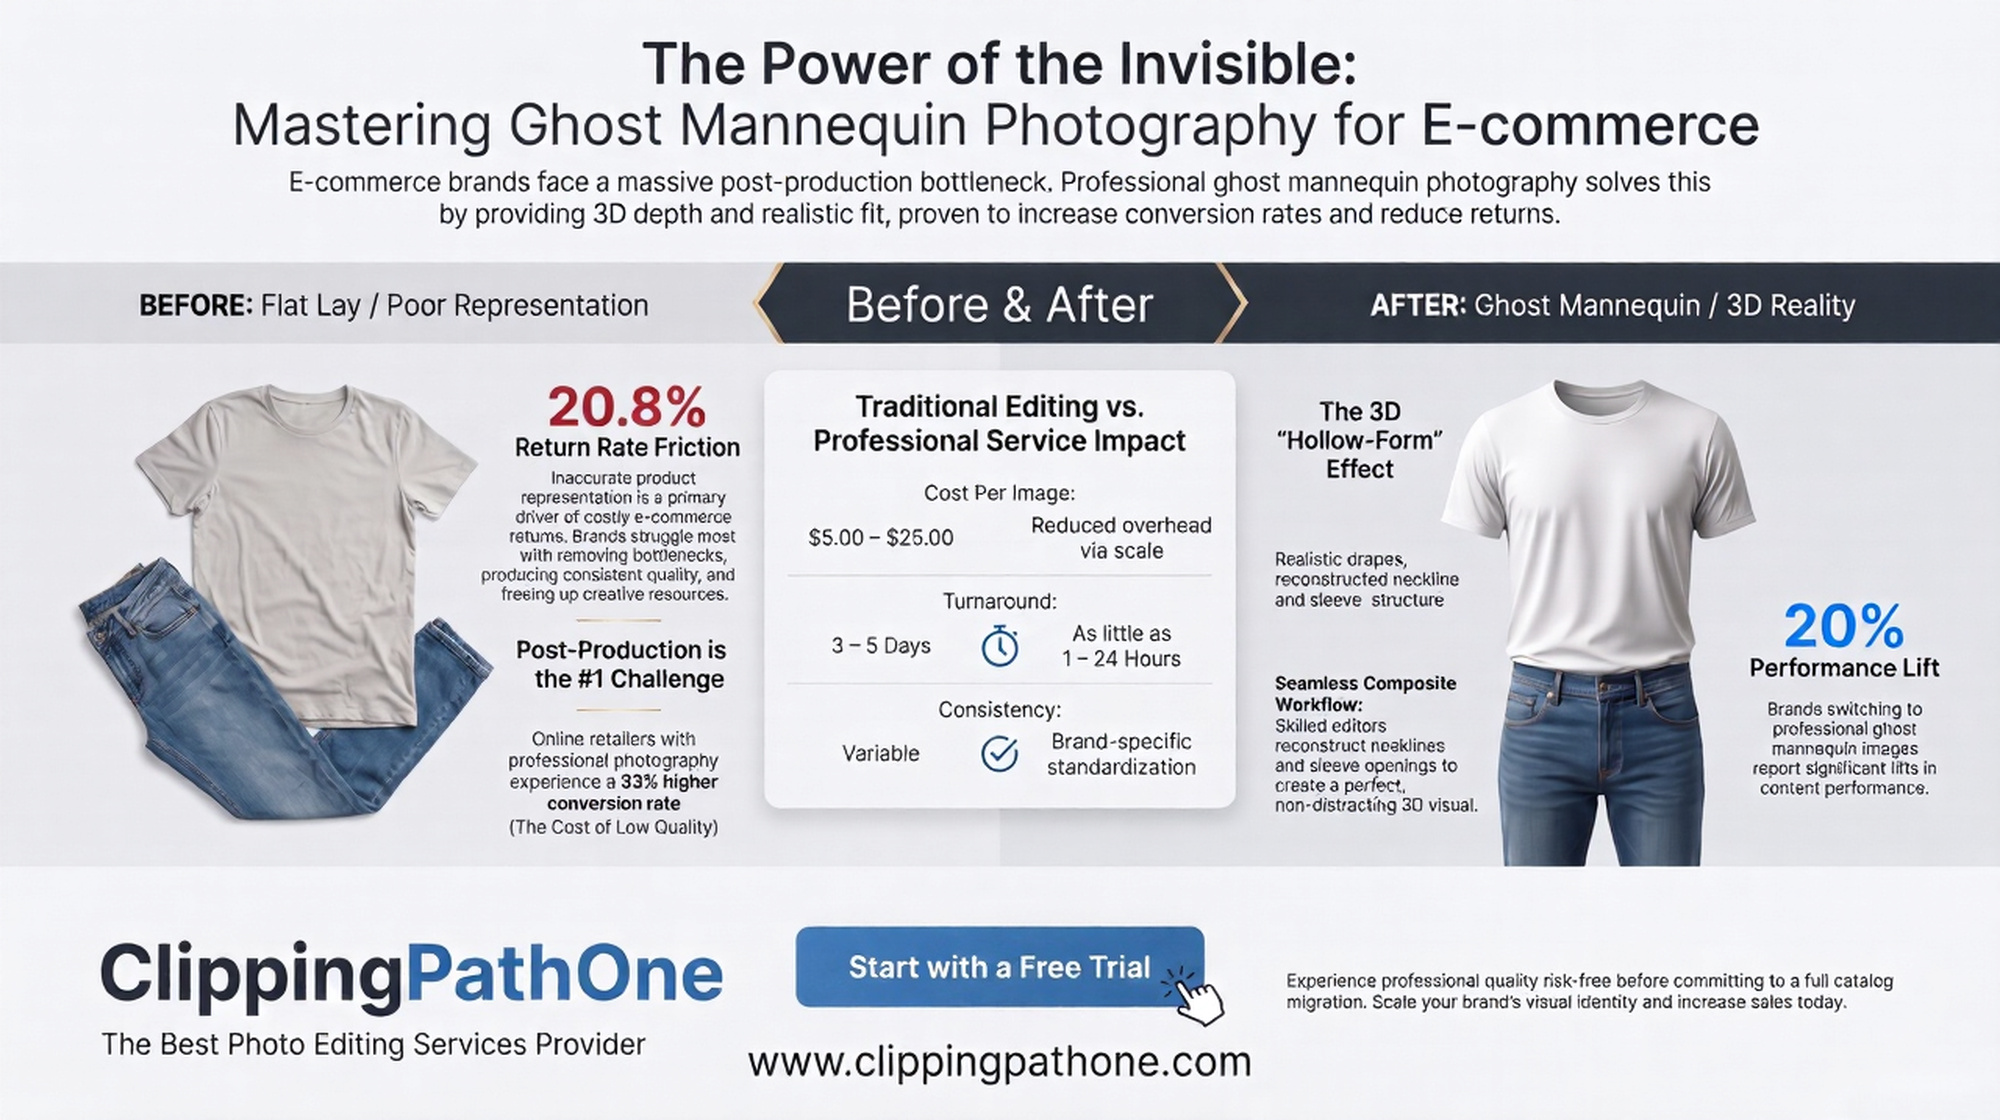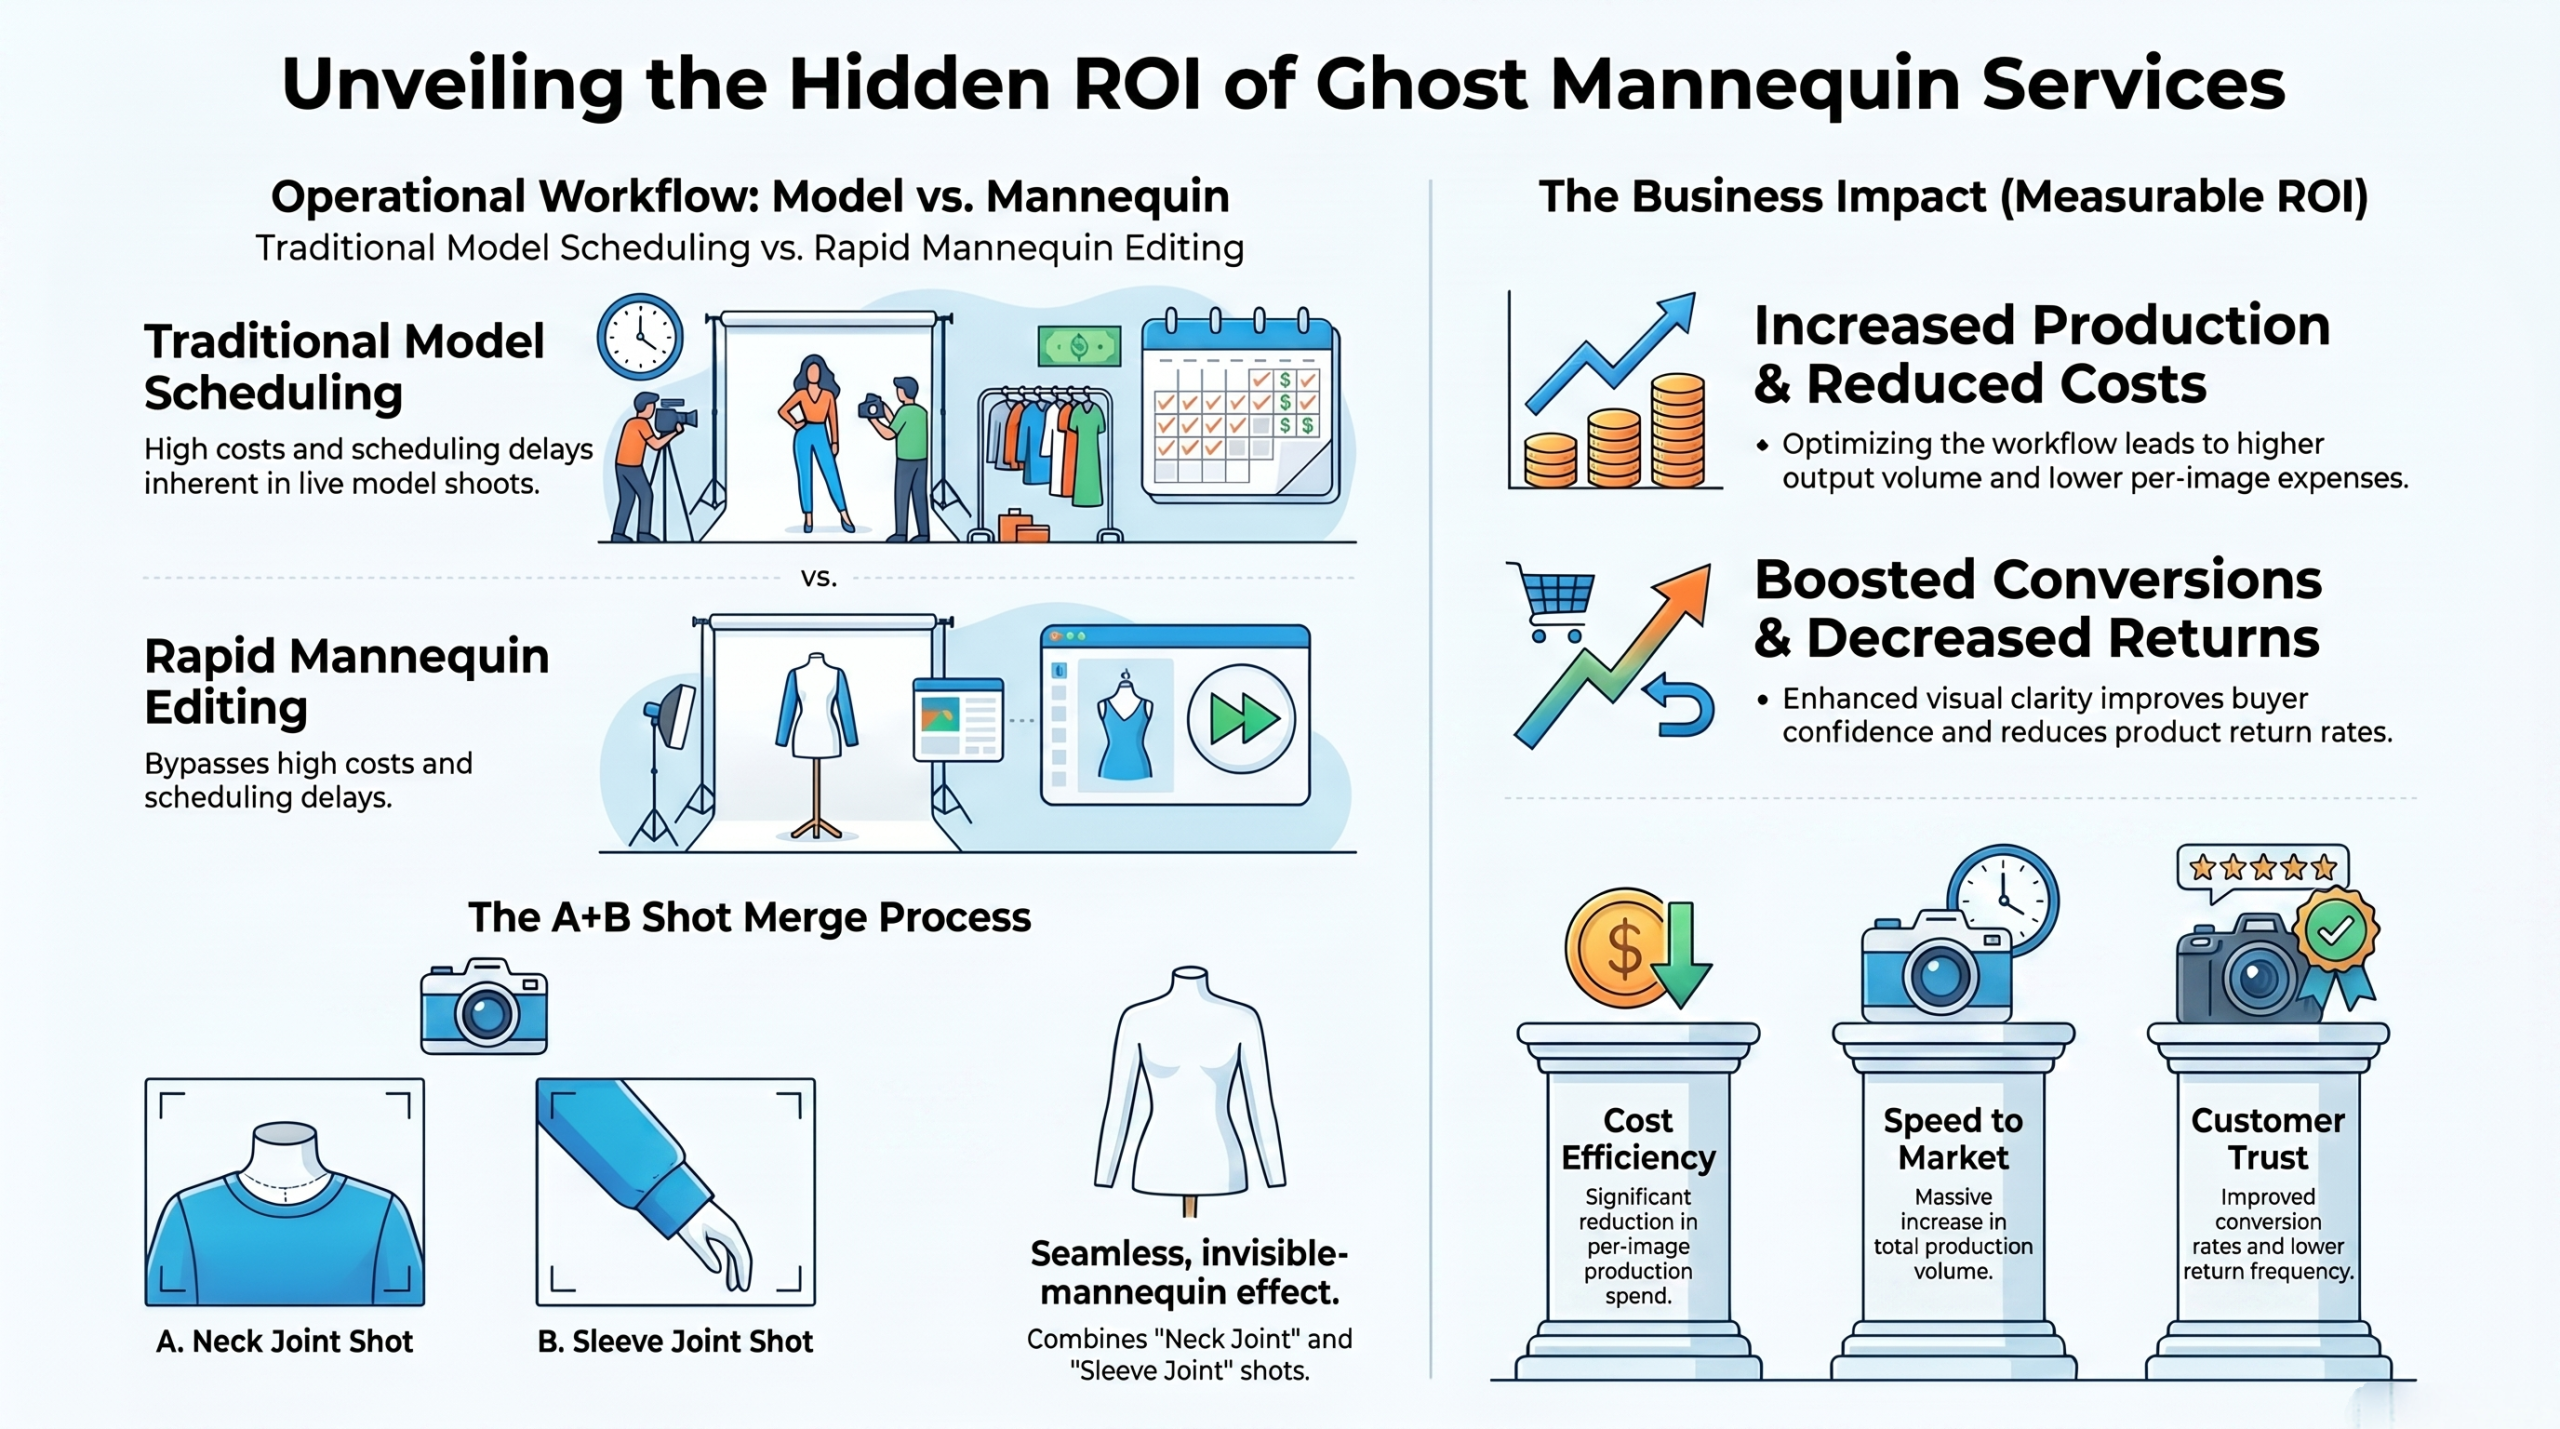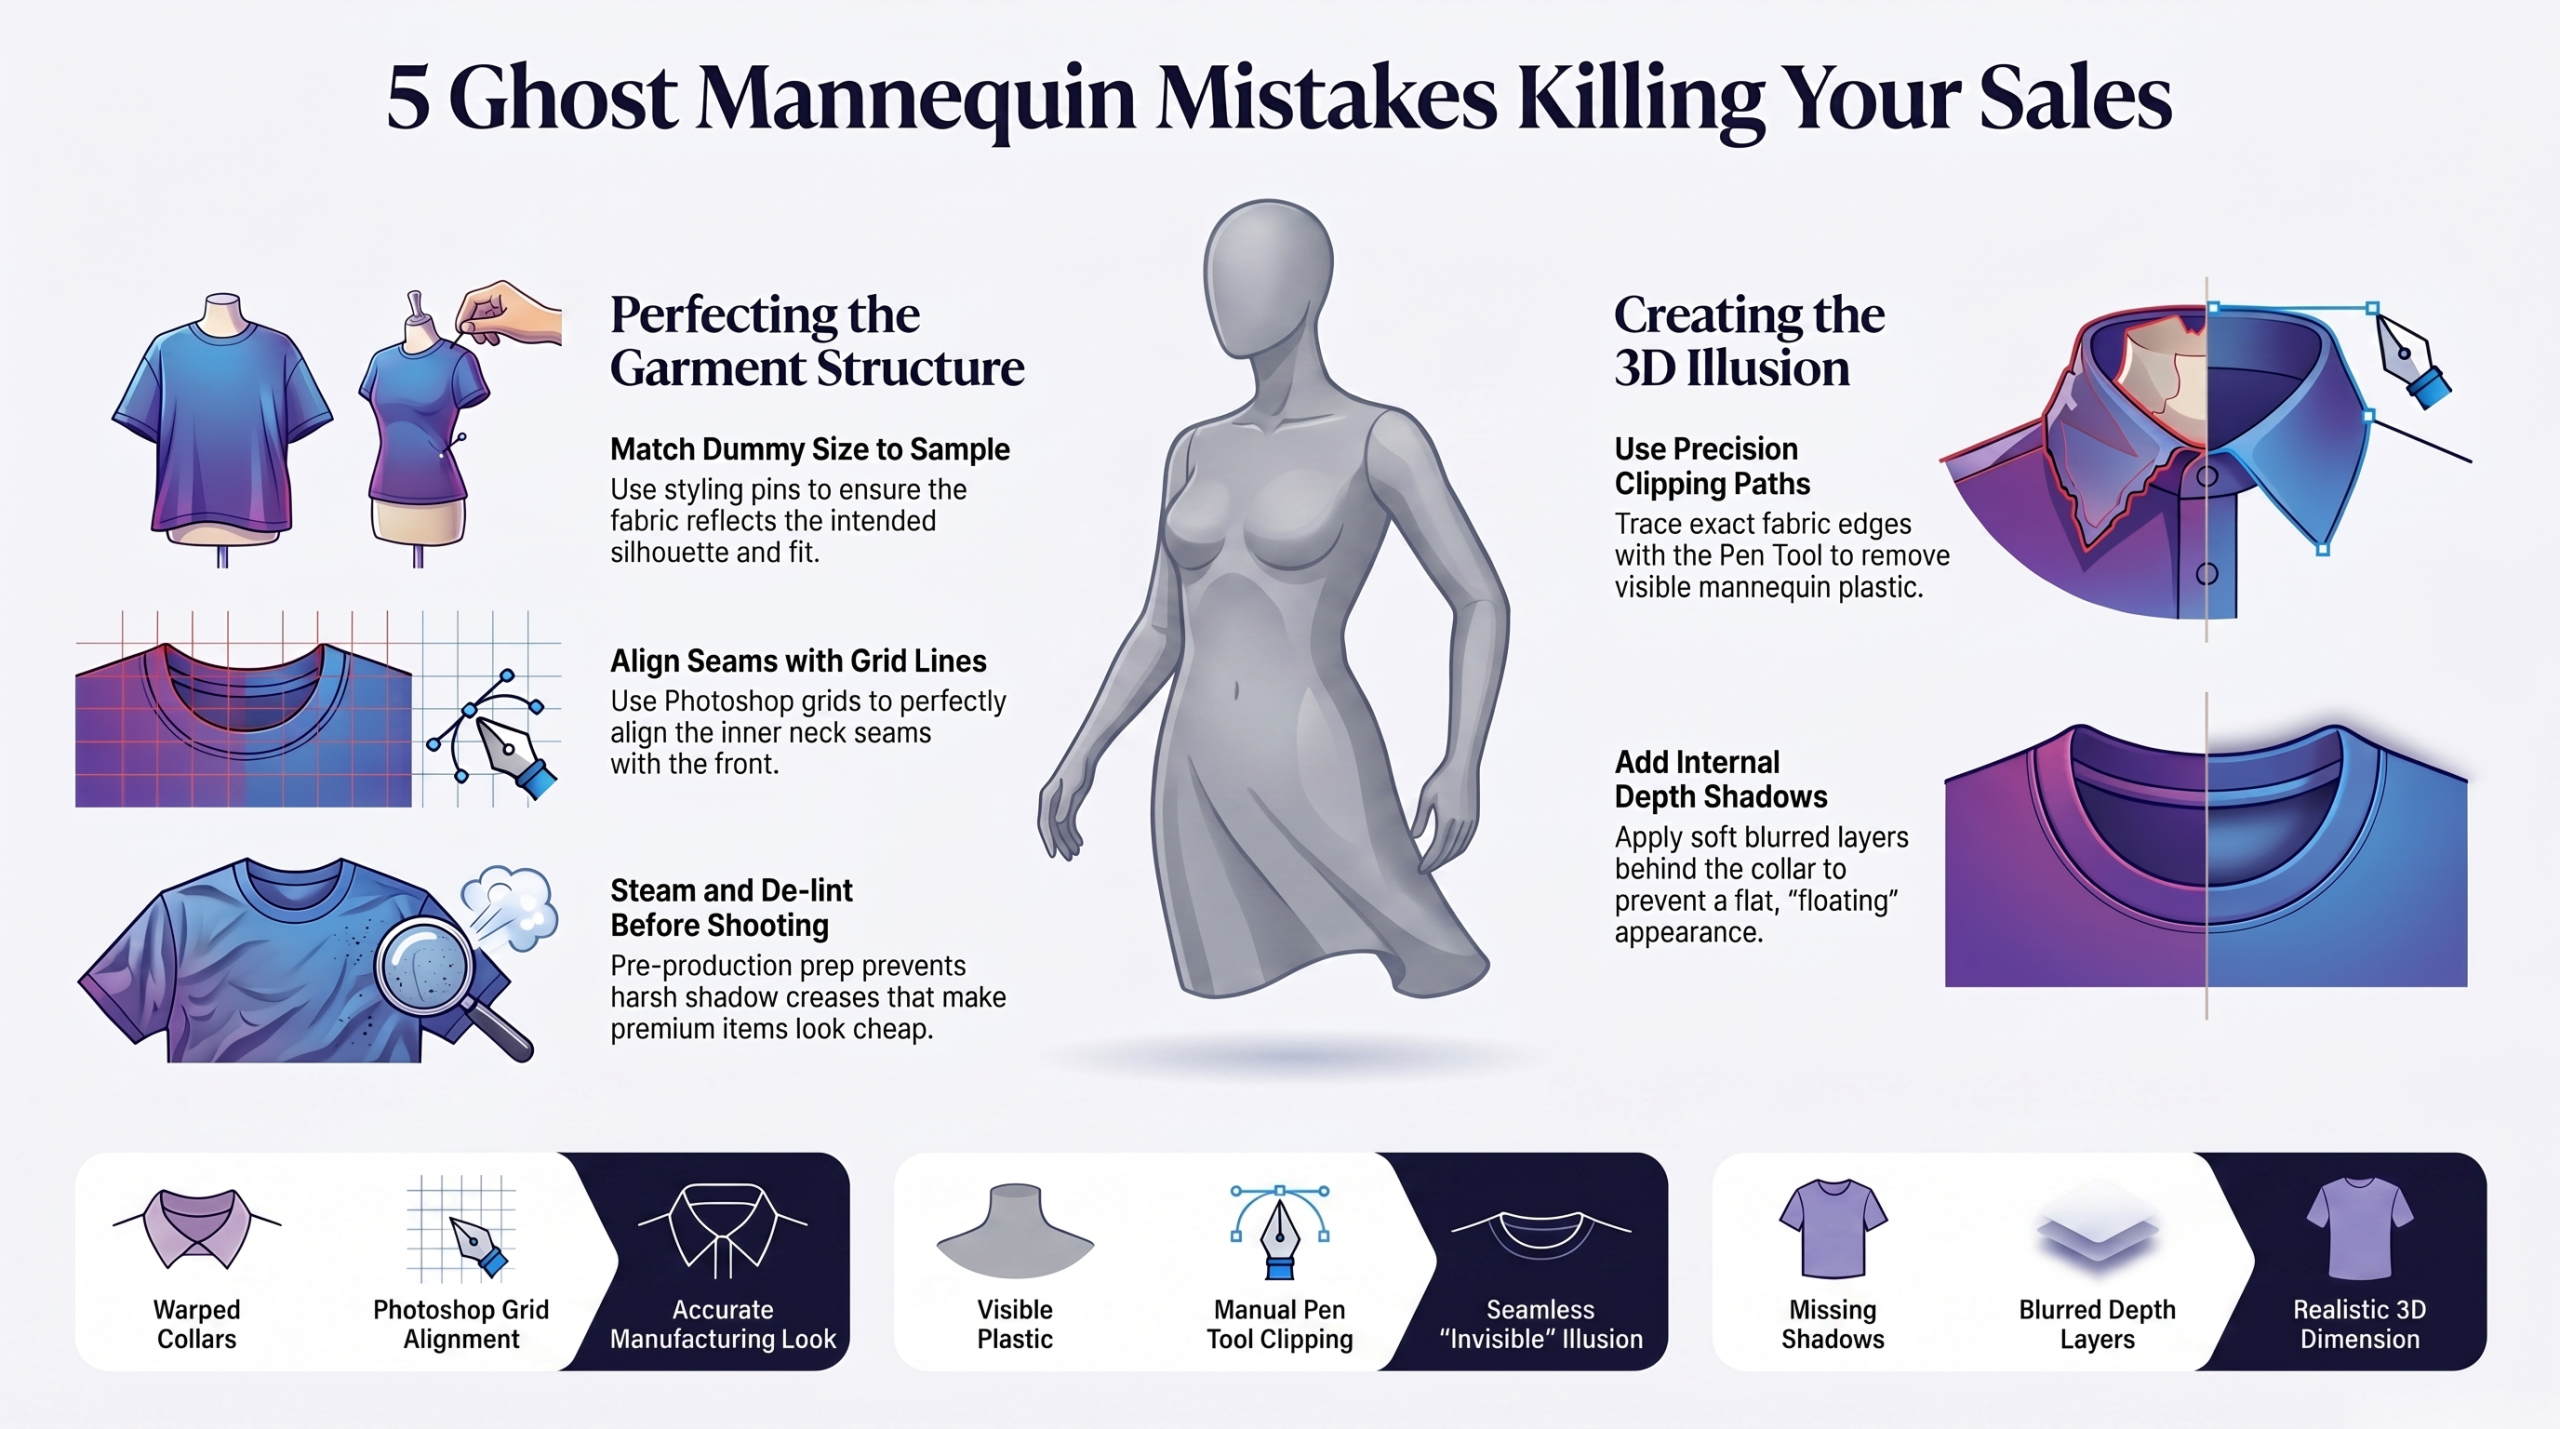
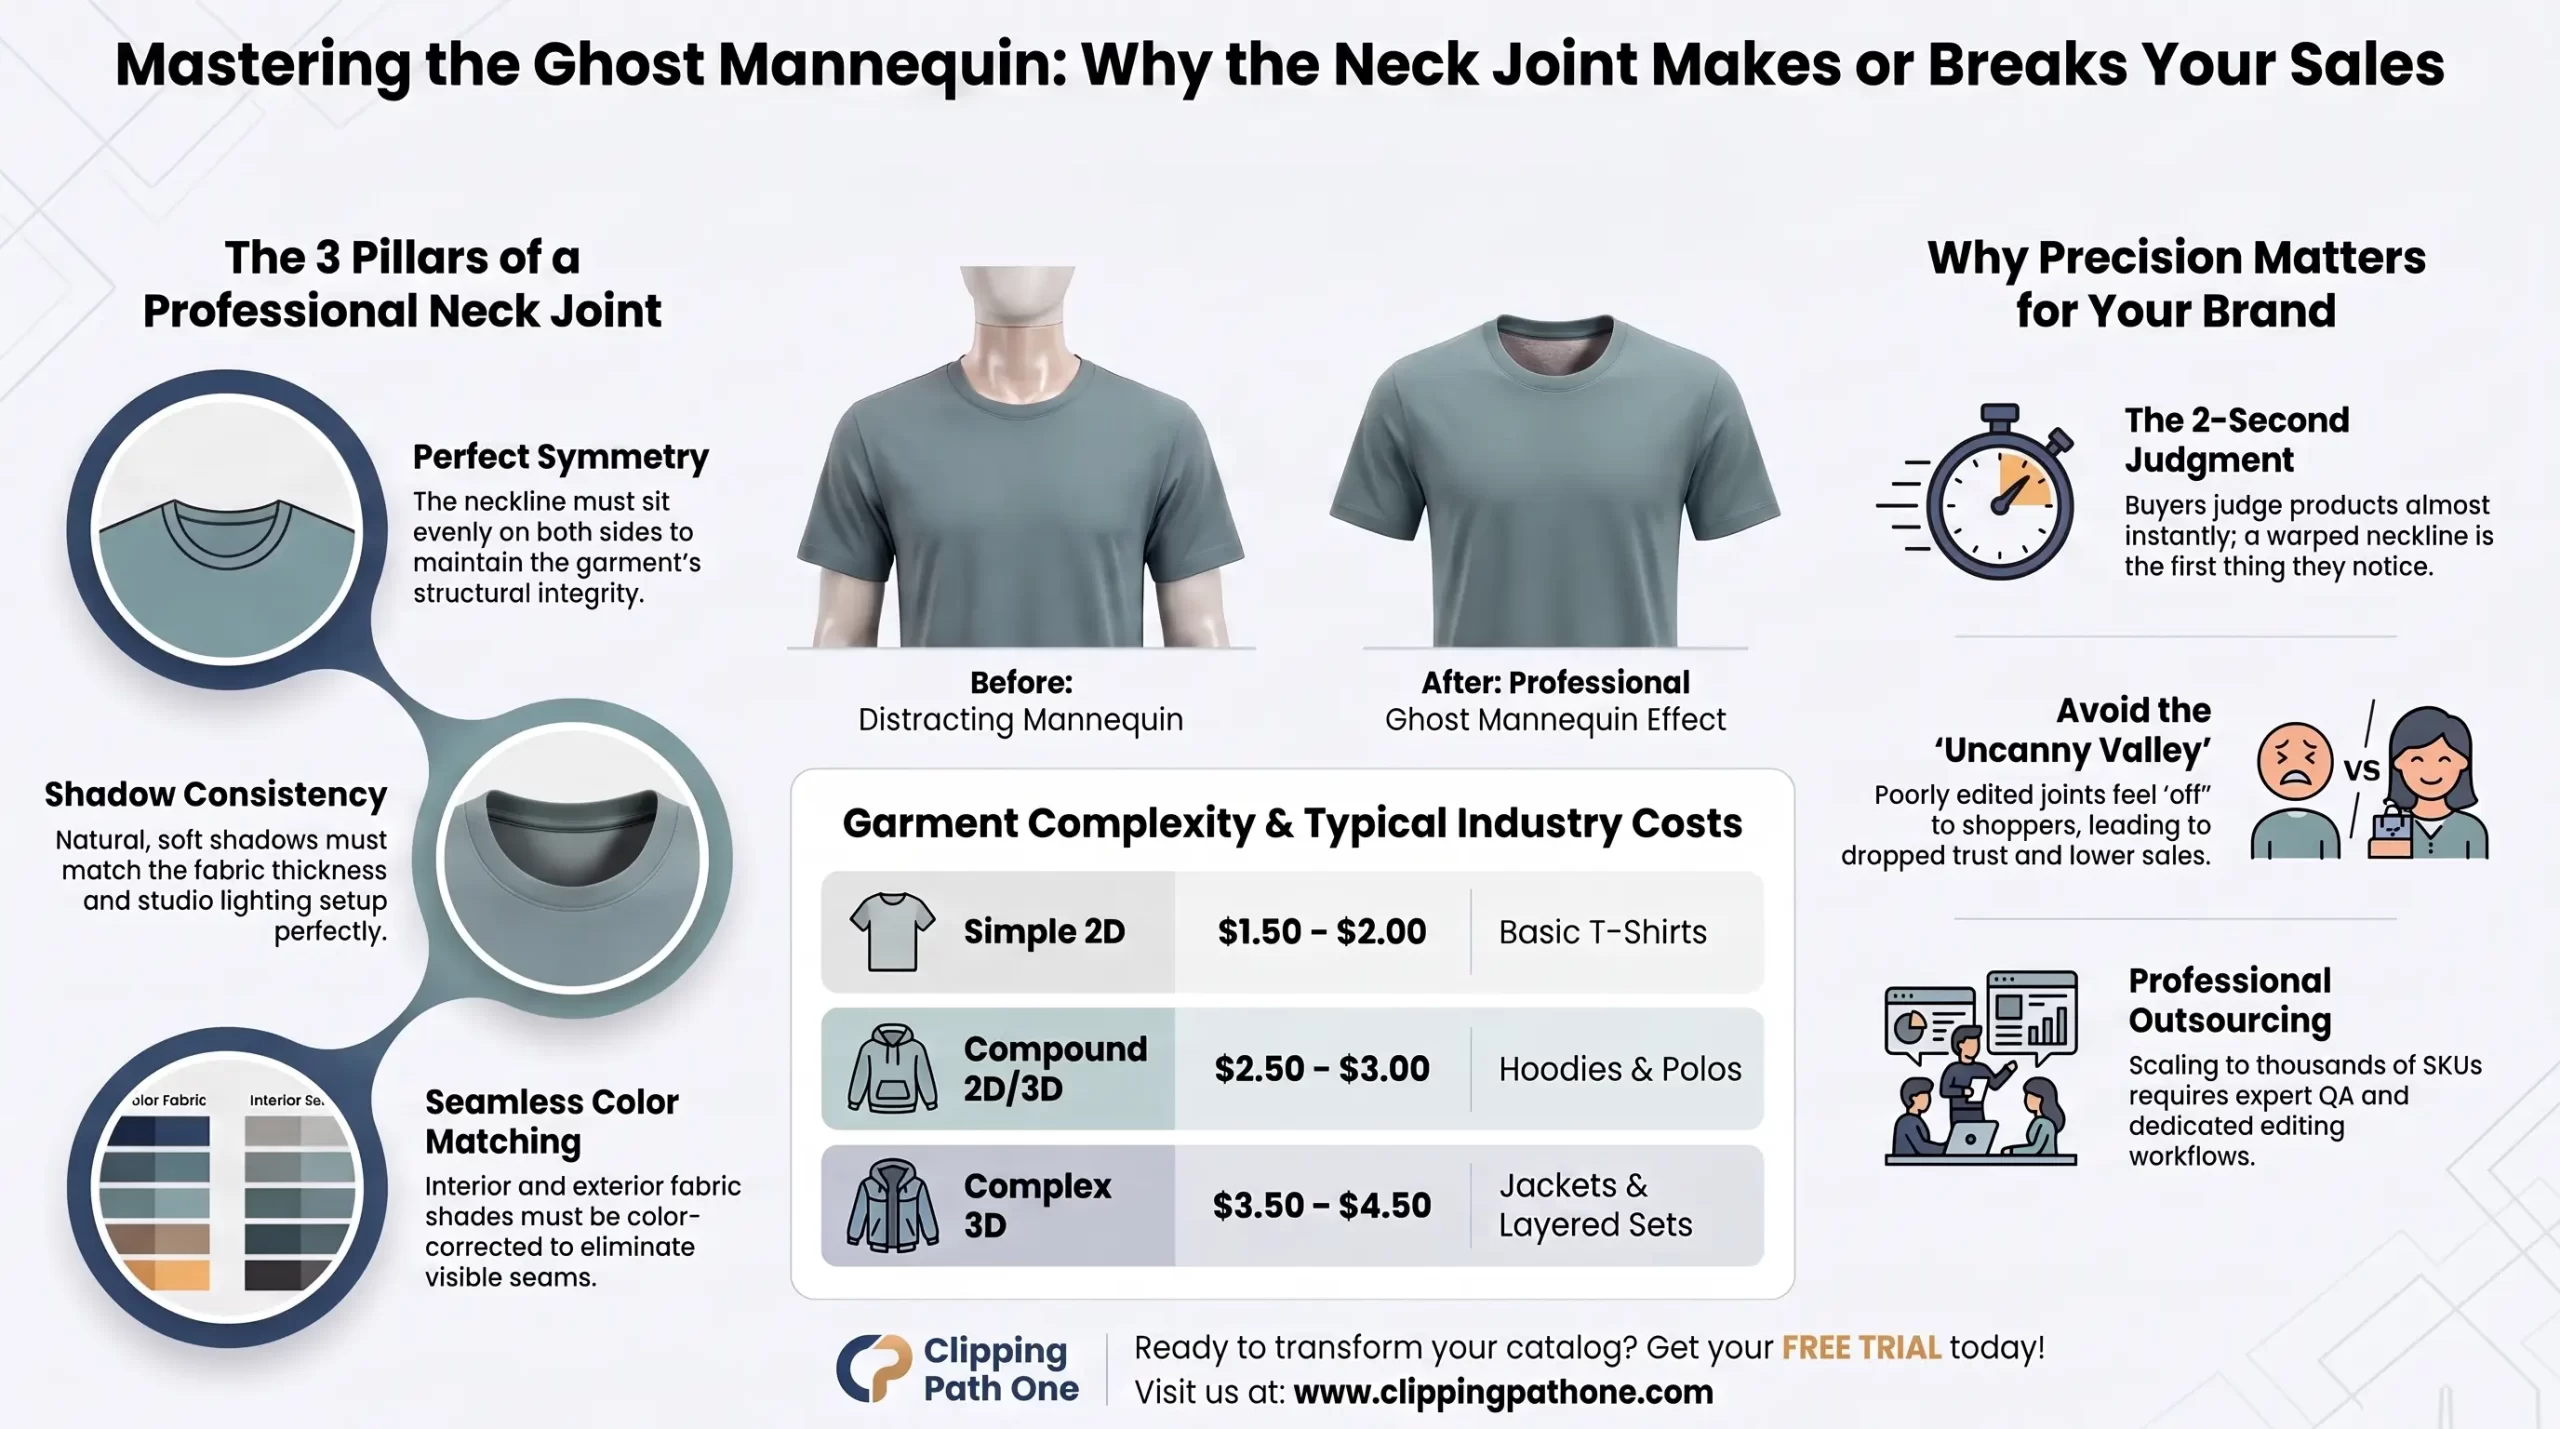
Here’s the short answer neck joint editing is the process of digitally removing a mannequin’s neck and shoulders from a garment photo and replacing that gap with a real interior shot, so the product looks like it’s floating with a natural, hollow neckline. Get this step wrong, and the whole ghost mannequin effect falls apart. Get it right, and your product photos look like they belong in a high-end catalog, not a garage sale listing.
I’ve spent 16 years in the digital imaging trenches, mostly working with apparel brands and ecommerce sellers who send us thousands of images a week. And if there’s one thing I’ve learned, it’s this: buyers judge a product in about two seconds. That neckline is usually the first thing their eyes land on. If it looks fake, warped, or oddly stitched together, they bounce. It doesn’t matter how good your lighting was or how sharp your camera is. A bad neck joint ruins everything else you did right.
Let’s actually dig into why this one small technical step carries so much weight.
What Is Neck Joint Editing, and Why Does It Exist?
Neck joint editing exists because mannequins and dress forms physically block the collar area of a garment. Editors composite a separate interior neck shot onto the main image to make it look like the shirt or dress has no mannequin inside it at all just a natural, empty neckline.
The Core Problem: Mannequins Leave Gaps at the Collar
Think about how a ghost mannequin shoot actually works. A photographer puts a garment on a mannequin, shoots it from multiple angles, then removes the mannequin from the shot digitally. Sounds simple, right? Here’s the catch. The mannequin’s neck piece has to physically sit inside the collar to hold the garment’s shape. Once you cut that mannequin out digitally, you’re left with a hole. A dark, hollow, weird-looking gap where a neck used to be.
That gap is the whole reason neck joint editing exists. Without it, you’d have a perfectly shaped shirt with a black void punched into the collar. Not exactly something that inspires buyer confidence.
What a “Neck Joint” Actually Is, In Plain Terms
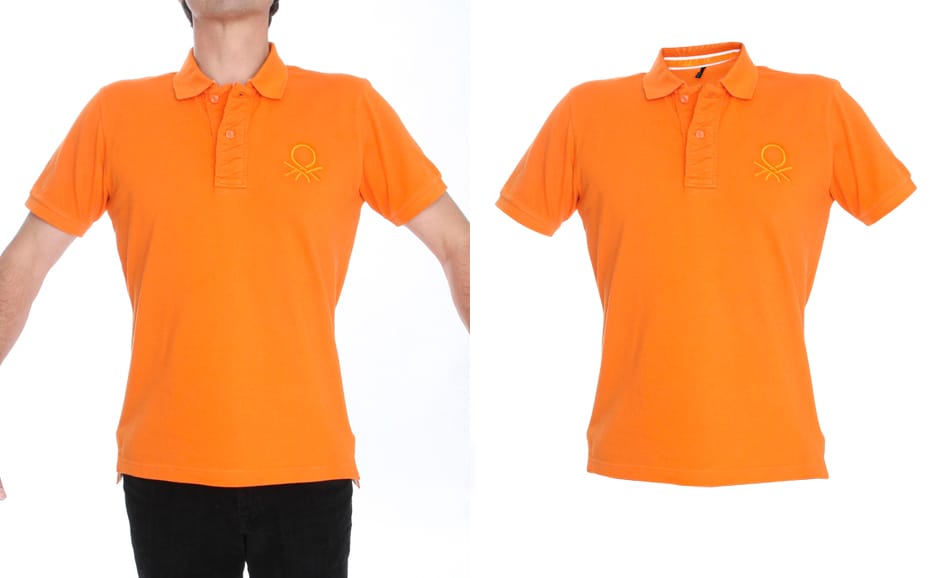
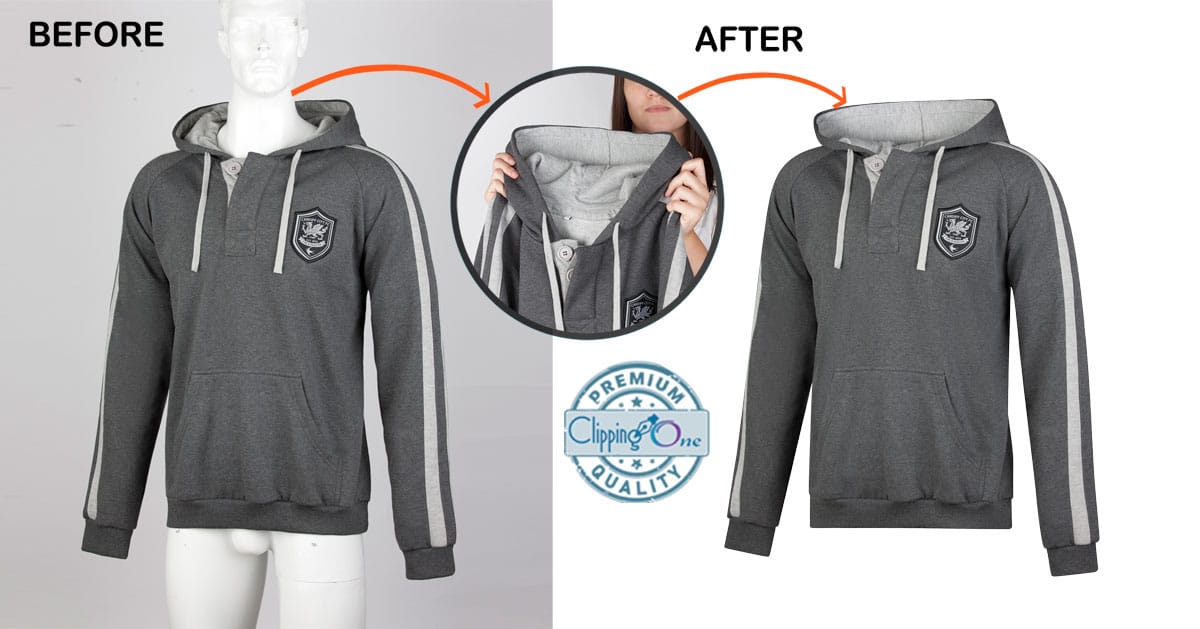
A neck joint is the point where two separate images get blended into one seamless photo. Usually, it’s a front shot of the garment on the mannequin, combined with a second shot often taken from the back, or with the collar folded open showing the actual interior of the neckline. The editor takes that interior piece, carefully places it into the gap, matches the lighting and color, and blends the edges so there’s no visible seam.
Done well, nobody notices it happened. Done badly, you get a neckline that looks like it was cut out with scissors and taped back together. I’ve seen both extremes more times than I can count.
Ghost Mannequin vs. Invisible Mannequin vs. Neck Joint How These Terms Relate
People throw these three terms around like they’re interchangeable, and honestly, that mix-up causes a lot of confusion for brands shopping for a service provider.
- Ghost mannequin effect is the umbrella term. It describes the entire technique of making a garment look like it’s worn by an invisible person.
- Invisible mannequin is basically the same concept, just a different name used more often in the UK and by some agencies.
- Neck joint editing is one specific, critical piece of that broader ghost mannequin process. It’s not the whole job. It’s the part that deals specifically with collars and necklines.
You can have a technically solid ghost mannequin edit everywhere else clean background, sharp shadows and still ruin the entire photo with one careless neck joint. That’s how important this piece is.
Who Actually Needs This
In my experience, four groups rely on this heavily:
- Apparel and fashion brands shooting catalog images at scale, especially for t-shirts, hoodies, dresses, and jackets.
- Ecommerce sellers on Amazon, Shopify, and similar platforms, where consistent product presentation directly affects conversion rates.
- Photography studios and agencies that shoot for multiple clients and need a reliable post-production partner.
- Print catalog producers, who still need pixel-perfect neck joint editing photos even in a digital-first world.
If you’re producing more than a handful of product photos a month, you’ve probably already run into this problem, even if you didn’t know it had a name.
How Neck Joint Editing Directly Affects Image Quality
Neck joint editing determines image quality because a bad joint creates visible seams, mismatched color, and unnatural shadows that instantly signal “fake” to a viewer. A well-executed joint preserves symmetry, blends shadows naturally, and matches skin-tone or fabric color so precisely that the eye reads it as a real, hollow neckline.
The “Uncanny Valley” Effect of a Bad Neck Joint
There’s a concept in animation and robotics called the uncanny valley. It’s that unsettling feeling you get when something looks almost human, but not quite. Turns out, the same thing happens with product photos.
A poorly done neck joint doesn’t look obviously wrong at first glance. That’s actually the problem. It looks almost right. Then your brain catches the mismatch a slightly darker shade at the collar, a soft blur where the rest of the image is sharp, a shadow falling the wrong direction. And once a shopper notices one flaw, they start hunting for more. Trust drops fast after that.
I’ve watched this play out with clients more than once. A brand sends over “finished” photos from an in-house intern, proud of the work. The garment looks fine everywhere except that collar. It’s subtle. But subtle is still enough to make a shopper feel like something’s off, even if they can’t say exactly why.
Symmetry, Shadow, and Color-Match as the Three Quality Pillars
After years of reviewing thousands of these images, I’ve boiled quality neck joint editing down to three non-negotiable pillars.
Symmetry. The neckline has to sit evenly on both sides. If one side dips lower than the other, or the collar looks twisted, the whole garment looks structurally broken, even though nothing is actually wrong with the physical product.
Shadow consistency. Real necklines cast soft, specific shadows based on the fabric’s thickness and the studio lighting setup. If the composited interior shot was taken under different lighting than the front shot, the shadows won’t match. That mismatch is one of the fastest ways to spot an amateur edit.
Color match. This one trips up more editors than you’d think. Interior fabric can look slightly different in color compared to the outer collar, especially with lighting shifts between shots. If the color temperature isn’t corrected, you get a visible seam where the two images meet, even if the geometry is perfect.
Nail all three, and the joint disappears. Miss even one, and the eye catches it immediately.
How Marketplaces Penalize Inconsistent Product Images
Here’s something a lot of sellers don’t fully appreciate. Amazon, and platforms like it, don’t just care about image quality out of aesthetic preference. Their algorithms and quality review teams actively flag inconsistent, low-quality product photography. Backgrounds that aren’t pure white, awkward crops, and yes, visibly broken neck joints, can all hurt how your listing performs or even get it suppressed.
Beyond the platform rules, there’s a harder cost: conversion rate. Shoppers scroll fast. A product photo with a warped or oddly seamed neckline reads as low-effort, even if your product itself is high quality. That perception gap between “actual product quality” and “perceived quality from the photo” is exactly what good neck joint editing closes.
Case Study: Fixing Conversion Through Better Neck Joint Editing
Industry Example Scenario (hypothetical, based on realistic conditions commonly seen in the apparel ecommerce space):
Brand: A mid-sized activewear label selling primarily through Shopify and Amazon.
Challenge: The brand had been using an in-house design intern to handle basic ghost mannequin editing to save costs. Product photos looked acceptable on desktop but showed visible neck joint seams when zoomed in something a growing number of mobile shoppers were doing before purchase.
Strategy Implemented: The brand switched to a dedicated photo editing workflow specifically for neck joint work, including a two-shot capture process front and interior neck for every SKU, paired with a formal QA checklist before publishing.
Execution Process: Photographers were retrained to capture consistent lighting across both front and interior shots. Editors then handled compositing, shadow matching, and a dedicated symmetry pass before final review.
Results: Over a 90-day period, the brand reported fewer product return complaints citing “doesn’t match photos,” along with a measurable lift in add-to-cart rates on their top-selling collared shirts.
Key Takeaway: The fix wasn’t a full rebrand or new photography equipment. It was tightening one specific step in the post-production pipeline: how neck joint editing was executed and quality-checked.
This is a pattern I’ve seen echoed across the industry. It’s rarely the big, expensive changes that move the needle on product image quality. It’s usually the small technical details, like a collar seam, that shoppers notice without realizing why.
The Step-by-Step Neck Joint Editing Process
Short answer: Professional neck joint editing follows five core steps: preparing the photos, opening them in an editing tool like Photoshop, removing the mannequin from the front shot, compositing in the interior neck image, and blending everything with matched shadows and symmetry. Skipping or rushing any step is where quality breaks down.
Photograph Preparation
Good neck joint editing starts long before anyone opens Photoshop. It starts on the shoot floor.
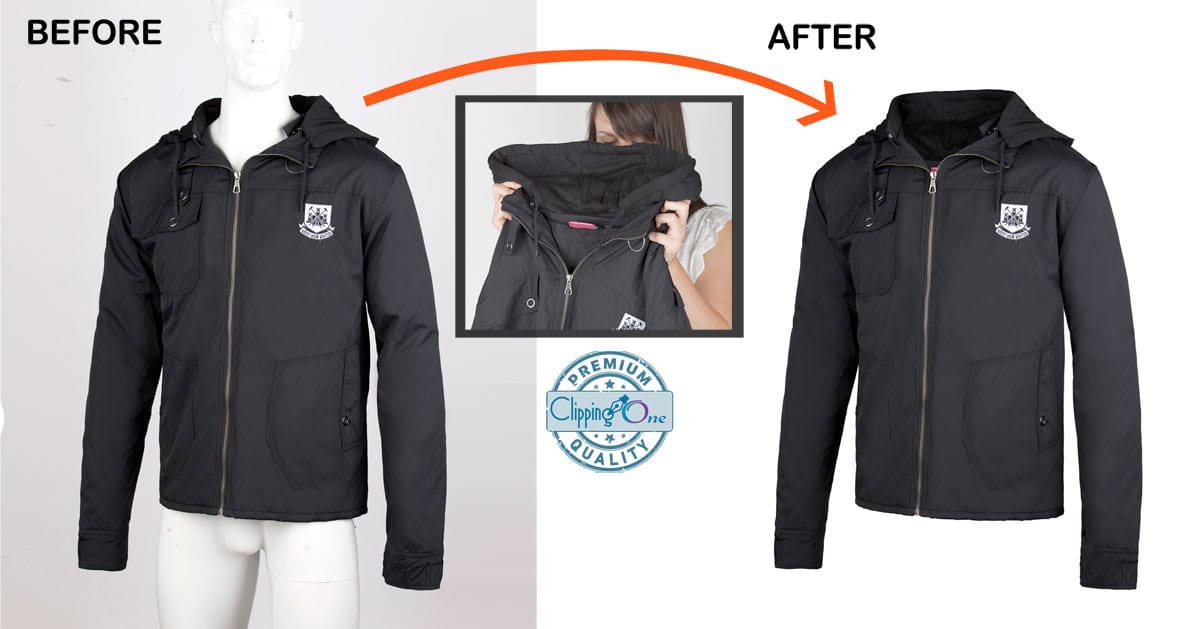
For this technique to work, photographers need to capture at least two shots of every garment: the front shot with the mannequin fully dressed, and a second shot showing the interior of the collar. That interior shot usually comes from either photographing the garment from the back, or lifting the collar to expose the inside neckline directly.
Here’s the part people underestimate. Lighting has to stay consistent between both shots. Same angle, same intensity, same white balance. If the interior shot is lit differently than the front, editors spend twice as long trying to color-correct it later, and honestly, sometimes it just never looks quite right no matter how much work goes into the fix.
Opening and Aligning Layers
Once the shots are in hand, the editor imports both images into a layered file, almost always Photoshop for commercial work. The front shot becomes the base layer. The interior neck shot goes on top, positioned roughly where the neckline gap will eventually sit.
This step is mostly about alignment. Getting the scale and rotation of the interior shot to roughly match the perspective of the front image. It doesn’t need to be perfect yet. That comes later. But getting the rough position right here saves a lot of frustration in the blending stage.
Removing the Mannequin from the Front Image
Next comes the clipping path work. The editor traces around the mannequin’s visible neck and shoulder area, and removes it from the front shot entirely. This leaves a clean, empty gap where the collar should show a hollow interior instead of solid plastic or foam.
This is where a lot of amateur edits go wrong. Rushed clipping leaves jagged edges or leftover slivers of the mannequin, and no amount of good blending afterward can fully hide a sloppy cut underneath.
Adding the Interior Neck Image
With the gap clean and open, the editor brings the interior neck shot into position, resizing and warping it slightly so it follows the natural curve of the collar. This is genuinely the most technical part of the whole neck joint editing process. Too much stretching and the fabric texture looks distorted. Too little adjustment and the shape looks flat and unnatural.
Experienced editors use tools like Liquify at this stage, applying very small, controlled adjustments rather than dramatic reshaping. The goal isn’t to force the interior image into place. It’s to nudge it just enough that it follows the real contour of the garment.
Blending the Neck Joint and Achieving Symmetry
Finally, the editor blends the seam between the two images. This means feathering the edges, matching shadow direction, and correcting any color mismatch between the front and interior shots.
Then comes the symmetry check. The editor looks at both sides of the collar and confirms the neckline sits evenly, without one shoulder appearing higher or the collar looking twisted. Small tweaks here, sometimes just a few pixels of adjustment, make the difference between a photo that reads as professional and one that looks obviously edited.
When this whole sequence is done properly, from photo prep through final blend, the seam becomes invisible. That’s the entire goal of neck joint editing: making two separate photos disappear into one believable image.
Types of Neck Joints by Garment and Collar Style
Short answer: Neck joint editing techniques change depending on the garment. A simple crew-neck t-shirt needs a basic front-to-back joint, while a jacket with a structured collar, a V-neck dress, or a 360° packshot each demand different compositing approaches, shadow work, and sometimes multiple interior shots.
Crew, V-Neck, Collar, and Jacket Neck Joints
Not every collar behaves the same way under the mannequin, and that changes the entire editing approach.
Crew necks are usually the easiest starting point. The neckline is round, symmetrical, and doesn’t fold or overlap. A single interior shot, cleanly composited, handles most crew-neck garments without much trouble.
V-necks add a layer of complexity. The point of the V has to line up precisely on both sides, and any slight misalignment is immediately obvious because the eye naturally follows that sharp angle down the chest.
Collared shirts (button-downs, polos) are trickier still. There’s a stiff collar structure sitting on top of the neckline, plus buttons and fabric folds near the top button, all of which need to look physically consistent even though there’s no mannequin actually holding that shape.
Jackets are the most demanding. Between the collar, lapels, and sometimes a hood, there can be multiple separate joints needed across one single garment. I’ve worked on jacket shoots where the editor had to blend three or four different interior shots just to make one photo look seamless.
360°/3D Packshot Neck Joints
This is where things get genuinely time-intensive. A 360° or 3D packshot means the garment is photographed from many angles, sometimes 12, 24, or even 36 separate frames, so it can be rotated interactively on a product page.
Every single one of those frames needs its own neck joint edit. And here’s the catch: the joint has to remain consistent across all frames. If the neckline looks perfect from the front but slightly off at the 45-degree angle, the whole rotating effect breaks the illusion the second a shopper starts spinning the product.
This is exactly why 3D ghost mannequin services usually cost more per image than a standard single-angle shot. It’s not just more images. It’s more images that all need to match perfectly.
Front vs. Back Neck Joints
Most neck joint work focuses on the front collar, since that’s what shoppers look at first. But garments photographed from the back, think hoodies with a distinct back print, or dresses with detailing along the spine, need their own separate back neck joint.
The back joint follows a similar workflow to the front, but there’s less room for error because there’s no collar structure to distract the eye. Any seam is more visible against a flat, open back panel.
Complex Collar Constructions
Some garments just don’t play nice. Turtlenecks, cowl necks, asymmetrical collars, and garments with multiple fabric layers at the neckline all require custom handling. There isn’t really a standard formula for these.
In my experience, this is where cheap or automated editing tools fall apart fastest. A basic AI tool can usually manage a simple crew neck. Hand it a cowl neck sweater with folds and drape, and it typically produces a flat, lifeless result that needs a human editor to fix anyway.
Neck Joint Editing Software, Apps, and Tools
Short answer: Adobe Photoshop remains the industry standard for professional neck joint editing because of its precision layering, Liquify, and masking tools. Newer neck joint editing apps and AI-assisted platforms are emerging for faster, simpler jobs, but most still require manual cleanup for anything beyond a basic crew-neck garment.
Photoshop as the Industry Standard
If you ask any professional photo editing team what tool they rely on for this work, the answer is almost always Photoshop. It’s not because there’s nothing else out there. It’s because nothing else matches its combination of precise layer control, non-destructive masking, and fine-grained tools like Liquify and the Pen tool for clipping paths.
Neck joint editing needs pixel-level accuracy. You’re blending two separate photographs into one believable image, and Photoshop gives editors the granular control to feather edges, match color curves, and adjust shadows independently on each layer. Most agencies, including the one I’ve worked with for years, still build their entire production pipeline around it.
Emerging Neck Joint Editing Apps and Plugins
That said, the landscape isn’t standing still. A growing number of neck joint editing apps and Photoshop plugins have popped up over the past few years, mostly aimed at speeding up repetitive tasks like clipping paths or basic shadow generation.
Some of these tools use AI to auto-detect the mannequin outline and remove it in seconds, cutting down the manual clipping time significantly. That’s genuinely useful for high-volume, simple garments. But I’ll be honest. Most of these apps still struggle with the actual joint compositing part, especially getting the interior shot to follow a garment’s natural curve. They’re assistants, not replacements, at least for now.
Neck Joint Editing Websites for Outsourcing
Beyond software, there’s a whole category of neck joint editing websites and service platforms built specifically for brands that want to outsource this work rather than handle it in-house. These range from large-scale photo editing agencies handling thousands of images a week, to smaller freelance marketplaces where you hire individual editors per project.
The trade-off here is fairly predictable. Larger agencies typically offer more consistent quality control and faster turnaround for bulk orders, since they run dedicated QA teams. Freelance platforms can be cheaper per image but often come with more variability in quality between editors.
Where Free Tools Fall Short for Commercial Use
I get asked a lot whether free background removal apps or basic AI photo tools can handle neck joint editing. Short answer: not really, not for commercial catalog work.
Free tools are usually built for simple background removal, not the layered compositing that neck joint work demands. They don’t handle shadow matching, fabric-specific Liquify adjustments, or the fine symmetry corrections that separate a professional image from an amateur one. For a single personal photo, sure, they’re fine. For a product catalog that represents your brand across hundreds of SKUs, the limitations show up fast, usually in the form of returns and complaints once customers notice the mismatch between the photo and the real product.
Manual vs. AI-Assisted Neck Joint Editing
Short answer: AI tools now handle basic neck joint editing tasks like mannequin outline detection and rough clipping, speeding up simple crew-neck jobs significantly. But manual expert editing still wins on complex fabrics, patterns, and symmetry, which is why most professional studios use a hybrid workflow rather than choosing one approach exclusively.
What AI Tools Can Automate Today
AI has made real progress in this space, and I don’t want to undersell that. Modern tools can detect a mannequin’s outline automatically, generate a rough clipping path in seconds, and even suggest basic shadow placement based on the garment’s shape.
For high-volume, simple garments, plain t-shirts, basic tank tops, standard crew necks, this can cut production time dramatically. What used to take a human editor several minutes per image can now be roughed out by software in seconds, leaving the editor to focus on final touch-ups rather than starting from scratch.
Where Manual Editing Still Wins
Here’s the reality, though. The moment you introduce a patterned fabric, a textured knit, a complex collar construction, or an unusual lighting setup, AI tools start to struggle. They tend to produce flat, generic-looking results because they’re pattern-matching against training data rather than actually understanding how that specific fabric drapes and folds.
Symmetry is another weak spot. AI-generated joints often get the general shape right but miss subtle asymmetries that a trained human eye catches instantly, like a collar sitting a few pixels too high on one side. That’s the kind of flaw that doesn’t show up in a quick preview but absolutely shows up once a customer zooms in on their phone.
In my experience, brands that go all-in on fully automated neck joint editing usually end up needing a second pass of manual correction anyway, which sometimes ends up costing more time overall than just starting with an experienced editor.
Industry Trend: Hybrid AI + Human QA Workflows
What’s actually working well right now is a hybrid model. AI handles the repetitive, low-complexity groundwork, initial clipping, rough alignment, basic shadow drafts, and human editors step in for the final compositing, symmetry correction, and quality assurance pass.
This is the direction most serious photo editing agencies have been moving toward. It keeps turnaround times fast enough to handle bulk catalog work, while still preserving the level of detail that separates a professional product photo from something that looks obviously machine-generated. I expect this hybrid approach to keep maturing, but I’d be skeptical of anyone claiming fully automated neck joint editing is ready to replace trained editors across the board, at least not yet.
Common Mistakes and Advanced Troubleshooting
Short answer: The most common neck joint editing mistakes are misaligned interior and exterior shots, mismatched fabric color between the two images, visible ghosting artifacts along the seam, and inconsistent shadow direction. Each has a specific, fixable cause rooted in either the original photo shoot or the compositing process.
Misaligned Interior and Exterior Shots
This is probably the single most common issue I see when reviewing rushed work. The interior neck shot doesn’t quite match the angle or scale of the front image, so when it’s composited in, the collar looks subtly warped or tilted.
Why it happens: Usually, it traces back to the photo shoot itself. If the photographer didn’t keep the camera angle and distance consistent between the front and interior shots, the editor is stuck trying to force two mismatched perspectives together.
The fix: The real solution starts before editing even begins, with a standardized shooting protocol that locks camera position and mannequin placement between shots. If you’re stuck with already-misaligned photos, an experienced editor can use Photoshop’s Transform and Warp tools to manually correct the perspective, though this takes considerably more time than working with well-aligned source images.
Color Mismatch Between Front and Back
Nothing gives away an amateur edit faster than a neckline that’s a slightly different shade than the rest of the garment. The interior fabric colored shot often has different color temperature or exposure than the front, and left uncorrected, it creates a jarring seam.
Why it happens: Lighting shifts between shots, even a slightly different bulb temperature or a camera auto white-balance recalibrating, will produce color differences that seem small on screen but are obvious once printed or viewed at full size.
The fix: Editors use color matching tools like Curves and Selective Color to bring the interior shot in line with the front image. Some studios avoid this problem entirely by locking camera white balance manually for the whole shoot session rather than letting it auto-adjust between frames.
Visible Seams or Ghosting Artifacts
Ghosting shows up as a faint outline or double-edge effect right where the two images meet, almost like a shadow of the original mannequin edge is still visible underneath the composite.
Why it happens: This usually comes from an imprecise clipping path around the mannequin removal step, or from feathering the blend edge too aggressively or not enough.
The fix: A tighter, more precise clipping path from the start prevents most ghosting. When it does show up, editors typically fix it with careful use of the Clone Stamp and Healing Brush tools directly along the seam, rather than trying to mask it with heavier feathering, which often just spreads the problem into a soft blur instead of eliminating it.
Inconsistent Shadow Direction
If the shadows in the front shot fall to the left, but the interior shot’s shadows suggest a light source from the right, the final image looks physically impossible, even if the viewer can’t immediately articulate why it feels wrong.
Why it happens: Again, this traces back to lighting setup during the shoot. If the interior shot was captured under different studio lighting than the front, the shadow direction will naturally conflict.
The fix: Editors manually redraw or adjust the shadow using layer masks and gradient tools to create a single, consistent light source across the whole image. This is one of the more time-intensive fixes, which is exactly why getting the original shoot lighting right matters so much in the first place.
Cost-Benefit Analysis — In-House vs. Outsourced Neck Joint Editing
In-house neck joint editing gives you direct control but requires training, software licenses, and ongoing staff time that rarely scales well past a few hundred images a month. Outsourcing to a dedicated provider usually costs less per image at volume and includes built-in quality assurance, though it means giving up some day-to-day control over the process.
Cost Per Image Breakdown
Pricing in this industry typically scales with complexity, and it’s worth understanding the tiers before budgeting for a catalog shoot.
| Complexity Level | Typical Price Range (Per Image) | Example Garment |
| Simple 2D neck joint | $1.50 – $2.00 | Basic t-shirt, tank top |
| Compound 2D/3D neck joint | $2.50 – $3.00 | Button-down shirt, hoodie |
| Complex 3D neck joint | $3.50 – $4.50 | Jacket, layered garment, 360° packshot |
These numbers vary by provider and region, but the pattern holds industry-wide: complexity drives cost, and 360° or 3D packshot work costs meaningfully more because every rotational frame needs its own consistent joint.
Time Cost of Training In-House Staff
This is the part brands often underestimate. Getting a new hire competent enough to handle neck joint editing at a professional standard usually takes weeks, not days, especially for anything beyond basic crew necks. During that ramp-up period, you’re paying a salary while also absorbing slower output and a higher rate of images that need rework.
There’s also turnover to consider. If a trained in-house editor leaves, you’re back to square one, retraining a replacement while your production pipeline slows down.
ROI When Scaling to Thousands of SKUs
For a small brand shooting a few dozen products a season, in-house editing can make sense, especially if someone already has the skill. But once you’re scaling into hundreds or thousands of SKUs, the math tends to shift.
A dedicated outsourced provider already has trained editors, established QA processes, and enough volume to offer competitive per-image pricing. Compare that to the fully loaded cost of an in-house team, salary, software licenses, training time, equipment, and the per-image cost of outsourcing often comes out lower once you’re operating at real catalog scale.
When Outsourcing Makes Sense vs. When It Doesn’t
Outsourcing tends to make the most sense when:
- You’re processing high volumes of images on tight seasonal deadlines
- Your catalog includes complex garments (jackets, 3D packshots) that demand specialized skill
- You don’t have dedicated in-house design staff already trained on this exact task
In-house editing can still make sense when:
- Your volume is genuinely low and predictable
- You need extremely fast turnaround on individual images with no queue time
- Brand consistency requires very tight, hands-on creative control over every single frame
There’s no universal right answer here. It really comes down to your volume, your deadlines, and whether the complexity of your garments matches what an in-house team can realistically handle well.
Quality Assurance and the Neck Joint Editing Checklist
Short answer: A comprehensive neck joint editing checklist should verify symmetry, shadow consistency, color match, edge cleanliness, and correct file format before an image is approved. Skipping formal QA is one of the fastest ways for flawed images to slip through and reach customers.
What a Comprehensive QA Pass Checks For
Editing the image is only half the job. The other half is catching mistakes before they ship, and that requires a second set of eyes running a structured review, not just a quick glance.
A proper QA pass typically looks at the image at full resolution, often zoomed in specifically on the neckline, since that’s where problems hide. Reviewers check for symmetry issues, color seams, shadow direction, and any leftover artifacts from the clipping process. This step matters just as much as the editing itself. I’ve seen agencies with talented editors still ship flawed images simply because nobody had a formal review step in place.
A Practical Neck Joint Editing Checklist
Here’s a checklist structure that works well as a final review step before any image gets approved:
- Symmetry check — Does the collar sit evenly on both sides, with no visible tilt or twist?
- Color match — Does the interior fabric shade match the exterior collar under the same lighting?
- Shadow consistency — Does the shadow direction match the rest of the garment and the overall lighting setup?
- Edge cleanliness — Are there any visible seams, ghosting, or leftover mannequin fragments along the joint?
- Proportion check — Does the neckline size and shape look proportionate to the rest of the garment?
- Zoom test — Does the image still hold up when viewed at full resolution or zoomed in, not just as a thumbnail?
- Consistency across angles — For 360° or multi-angle shoots, does the joint remain consistent frame to frame?
Running through this list on every image, especially for high-volume catalog work, catches the vast majority of quality issues before they ever reach a customer.
File Formats and Delivery Standards
Beyond the visual quality itself, delivery format matters more than people expect. Most professional workflows deliver in one of three formats depending on the client’s use case:
- PSD — Preserves layers, useful if the client needs to make further edits later
- TIFF — High quality, lossless, common for print catalog use
- PNG — Widely used for ecommerce platforms, especially when transparency is needed
Getting this wrong, say, delivering a flattened JPEG when the client needed layered PSD files for future edits, creates unnecessary back-and-forth and delays. A good provider clarifies delivery specs upfront as part of the project brief, not after the images are already finished.
Neck Joint Editing Across Industries
Short answer: Neck joint editing is used most heavily by fashion and apparel brands, ecommerce marketplaces, photography studios, and print catalog producers, but each industry applies it slightly differently depending on volume, platform requirements, and how much emphasis is placed on visual consistency.
Fashion and Apparel Brands
Fashion brands were really the original driving force behind this technique, and it’s easy to see why. When you’re selling clothing, the customer can’t touch the fabric or try it on before buying. The photo has to do all the convincing. A clean, symmetrical neck joint communicates quality and craftsmanship before the customer even reads the product description.
Brands with larger catalogs, think hundreds of SKUs across multiple collections per season, tend to invest heavily in standardized neck joint editing workflows precisely because inconsistency across a catalog looks unprofessional fast. One garment with a crisp joint next to another with a visible seam creates an uneven brand impression, even if both products are equally well-made.
Ecommerce Marketplaces
For sellers on platforms like Amazon, Shopify, or Etsy, neck joint editing intersects directly with platform-specific image requirements. Many marketplaces have strict guidelines around background color, image consistency, and overall presentation quality, and a poorly executed ghost mannequin effect can hurt how a listing performs, both in terms of conversion and, in some cases, actual search visibility on the platform.
Sellers operating at scale, sometimes managing thousands of SKUs, tend to rely on outsourced providers here specifically because of the volume and deadline pressure around seasonal launches. A single delayed product image can mean a missed launch window entirely.
Photography Studios and Agencies
Studios and agencies occupy an interesting middle position. They’re not the end brand, but they’re responsible for delivering finished images to multiple clients, often with different quality standards and turnaround expectations for each one.
Many studios choose to outsource neck joint editing specifically, keeping photography in-house while handing off the more specialized post-production work to a dedicated partner. This lets them focus on what they do best, the actual shoot, lighting, and styling, while relying on editing specialists for the technical compositing work that follows.
Catalog and Print Use Cases
It’s easy to assume print catalogs are a dying use case in a digital-first retail world, but that’s not quite accurate. Print still matters for certain segments, wholesale catalogs, trade show materials, lookbooks distributed to retail partners, and the image quality bar for print is often even higher than for web use, since flaws that get lost in a small web thumbnail become glaringly obvious on a printed page.
This means print-focused clients typically require higher resolution source files and often stricter QA standards for neck joint editing, since there’s no zoom-to-check option for a printed catalog. What ships is final.
Careers and Skills — Neck Joint Editing Jobs
Short answer: Neck joint editing jobs typically require strong Photoshop skills, an eye for symmetry and color matching, and patience for detailed, repetitive compositing work. Entry-level editors usually start with simple crew-neck garments, while senior editors handle complex collars, 3D packshots, and quality assurance oversight.
What the Role Actually Involves Day to Day
People outside the industry sometimes assume this job is just clicking a few automated tools and moving on. It’s not, at least not for anyone doing it well. A typical day for a neck joint editor involves working through a batch of garment images, handling clipping paths, compositing interior shots, correcting color and shadow, and running each finished image through a personal quality check before passing it along to a formal reviewer.
The pace matters too. Agencies handling bulk catalog work often expect editors to process a set volume of images per day while maintaining consistent quality, which means efficiency and precision have to coexist. That balance takes real practice to develop.
Skills That Separate Junior from Expert Editors
Junior editors typically start with the basics: clean clipping paths, straightforward crew-neck compositing, and general Photoshop fluency. That’s a reasonable starting point, but it only covers a fraction of what the job eventually demands.
What separates an experienced editor is really about pattern recognition built through repetition. Someone who’s composited thousands of neck joints develops an instinct for spotting subtle asymmetry or a slightly off shadow almost instantly, without needing to consciously analyze the image. They also tend to be faster at handling difficult, non-standard collar constructions, since they’ve likely encountered similar problems before and already know which technique tends to work.
Color theory knowledge matters more than people expect too. Understanding why two shots under seemingly similar lighting can still produce a visible color mismatch, and knowing exactly which correction tool fixes that fastest, comes from experience, not just software familiarity.
How Agencies Train and Vet Editors
Serious photo editing agencies don’t just hand new hires client work on day one. Most run a structured onboarding process, starting with simple practice garments and gradually increasing complexity as the editor demonstrates consistent quality.
Vetting typically includes a practical skills test, editing a few sample images under realistic conditions, followed by a probationary period where a senior editor or QA reviewer checks every piece of that new hire’s work closely. This matters more in neck joint editing than in a lot of other photo editing specialties, precisely because the mistakes are often subtle enough that they can slip past a rushed review, only to surface later as customer complaints.
Industry Trends Shaping the Future of Neck Joint Editing
Short answer: The biggest trends shaping neck joint editing right now are AI-assisted 3D ghost mannequin generation, faster automated QA pipelines, and growing demand for 360° interactive product views. Manual expertise still plays a central role, but the workflows around it are becoming faster and more hybrid.
3D and AI-Generated Ghost Mannequin Effects
The most visible shift over the past couple of years has been the push toward 3D ghost mannequin work, driven largely by ecommerce platforms wanting interactive, rotatable product views instead of static images. This isn’t just a photography trend. It directly affects neck joint editing, since every one of those rotational frames needs a consistent, matching joint.
AI is playing a growing role here too, particularly in generating rough 3D models from a smaller set of source photos rather than requiring dozens of manually shot angles. It’s promising technology, but from what I’ve seen in actual production use, it still benefits heavily from human refinement, especially around collar and neckline details where the AI tends to smooth over fine texture and fabric behavior.
Automation in QA Pipelines
Quality assurance itself is starting to get automated assistance too. Some newer tools can flag likely symmetry issues or color mismatches automatically, essentially pre-screening images before a human reviewer takes a final look. This doesn’t replace manual QA, but it does help reviewers prioritize which images need closer attention, which matters a lot when you’re processing thousands of images on a deadline.
I expect this to keep expanding, not as a replacement for trained reviewers, but as a first-pass filter that catches obvious problems faster than a human scanning every single image manually.
What’s Likely to Change in the Next Few Years
Based on where the tools and platform requirements are heading, a few things seem likely. Demand for 360° and interactive product views will probably keep growing, especially as more marketplaces build native support for rotatable product galleries. That means more volume, not less, for neck joint editing work overall, even as automation handles more of the repetitive groundwork.
I’d also expect the gap between basic automated tools and professional-grade manual editing to narrow somewhat, but probably not close entirely, at least not in the near term. Complex garments, patterned fabrics, and unusual collar constructions still seem to require a level of judgment that current AI models haven’t fully mastered. That said, I’ve been wrong about the pace of this kind of thing before, and the tools genuinely are improving quickly.
Frequently Asked Questions
What is neck joint editing? Neck joint editing is a photo editing technique that removes a mannequin’s neck and shoulder area from a garment image, then composites in a separate interior neck shot so the product appears to float naturally without any visible support structure.
What’s the difference between neck joint editing and ghost mannequin editing? Ghost mannequin editing is the broader technique of making a garment look like it’s worn by an invisible person. Neck joint editing is one specific part of that process, focused only on the collar and neckline area.
What software is best for neck joint editing? Photoshop remains the industry standard because of its precise layering, masking, and Liquify tools. Some AI-assisted apps can handle basic clipping and rough shadow work, but complex garments still typically require manual finishing in Photoshop.
How much does neck joint editing cost per image? Pricing typically ranges from around $1.50 for simple crew-neck garments to $4.50 or more for complex 3D or 360° packshot work, depending on garment complexity and provider.
Can AI fully automate neck joint editing? Not yet, at least not reliably for complex garments. AI handles basic crew-neck shapes reasonably well, but patterned fabrics, textured knits, and unusual collar constructions still typically need manual correction from an experienced editor.
What shots do I need to provide for neck joint editing? You’ll generally need a front shot of the garment on the mannequin, plus a second interior shot, either from the back or with the collar lifted, showing the actual inside of the neckline, captured under consistent lighting.
How long does neck joint editing take per image? Simple garments can take a few minutes per image with an experienced editor. Complex collars or 3D packshot sequences with multiple angles can take significantly longer, since every frame needs a matching, consistent joint.
What file formats are used for delivering neck joint editing photos? PSD is common when clients need layered files for future edits, TIFF is preferred for high-quality print catalog use, and PNG is standard for ecommerce platforms, especially when transparency is required.
Conclusion
If there’s one thing I want you to take away from this guide, it’s this: neck joint editing isn’t a minor finishing touch. It’s one of the few technical steps that can single-handedly make or break how professional your product photos look. Get the symmetry, shadow, and color match right, and shoppers never even notice the editing happened. That’s the whole point.
Get it wrong, and no amount of good lighting or expensive photography equipment can save the image. I’ve watched brands invest heavily in studio setups only to undercut all of that with a rushed, careless neck joint that customers spot in seconds.
Whether you handle this in-house, lean on emerging AI tools, or outsource to an experienced editing team, the fundamentals stay the same. Consistent shooting conditions, careful compositing, and real quality assurance before anything ships. That combination is what separates catalog photos that build buyer trust from ones that quietly cost you sales.